Terrariums can be tiny moss jars, dramatic jungle scenes, open succulent bowls, or full-blown bioactive ecosystems.
Honestly, the range of options is part of the fun.
It’s also why people end up with a cactus sweating inside a pickle jar.
A good terrarium idea needs to fit the container, the plants, the humidity, and the amount of maintenance you actually want to do. Looks matter, obviously, but the setup has to make sense.
So, this list is focused on terrarium ideas that work in real containers, not just pretty concepts that fall apart after two weeks.

Easy Terrarium Ideas for Beginners
These are the best terrarium ideas if you want something achievable, low-stress, and still genuinely lovely.
1. Mason Jar Terrarium
A mason jar terrarium is the obvious beginner build for a reason.
It’s easy to start, easy to source, and forgiving enough that you don’t need specialist tools to make something that actually works. A clean jar from the kitchen will do the job nicely!
The shape helps, too. Mason jars are roomy enough for the proper layers, while still being wide enough that you can mostly work with your hands.
Then there’s the lid. Once sealed, it traps moisture and creates the warm, humid conditions tropical terrarium plants love.
If you only try one idea from this list, a mason jar terrarium is probably the safest place to start.
2. Fish Bowl Terrarium
Fish bowl terrariums are great when you want more visual space in a compact container.
The rounded glass gives you a broad viewing angle, and the wide-open top makes planting much easier. You can create a layered tropical scene, a mossy woodland bowl, or an open succulent display depending on the plants you choose.

A closed or mostly covered bowl suits tropical mosses and humidity-loving plants. Whereas an open bowl suits succulents, cacti, and air plants much better.
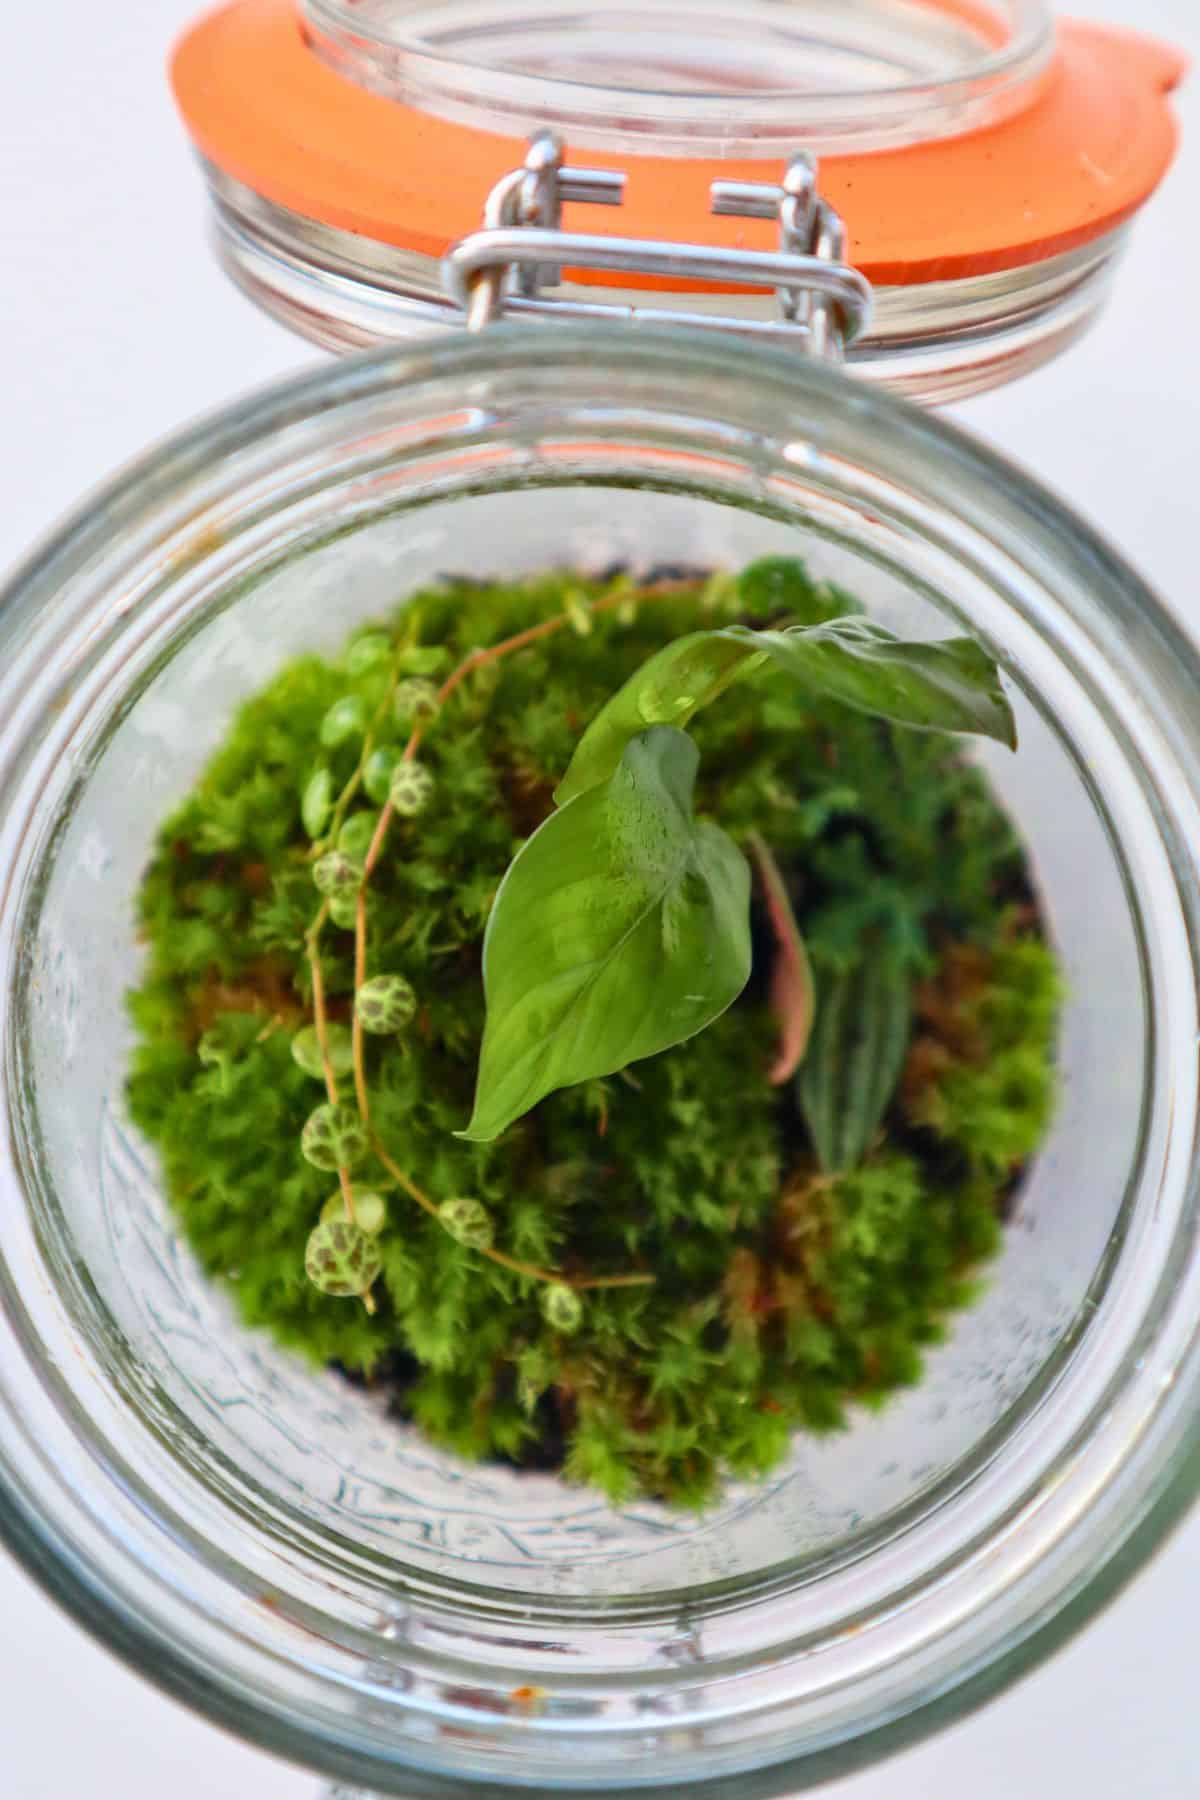
3. Mini Terrarium
A mini terrarium is the easiest way to play with scale.
A spice jar, miniature vial, old candle jar, apothecary bottle, or small glass pot can become a complete little green world without needing much space or commitment.
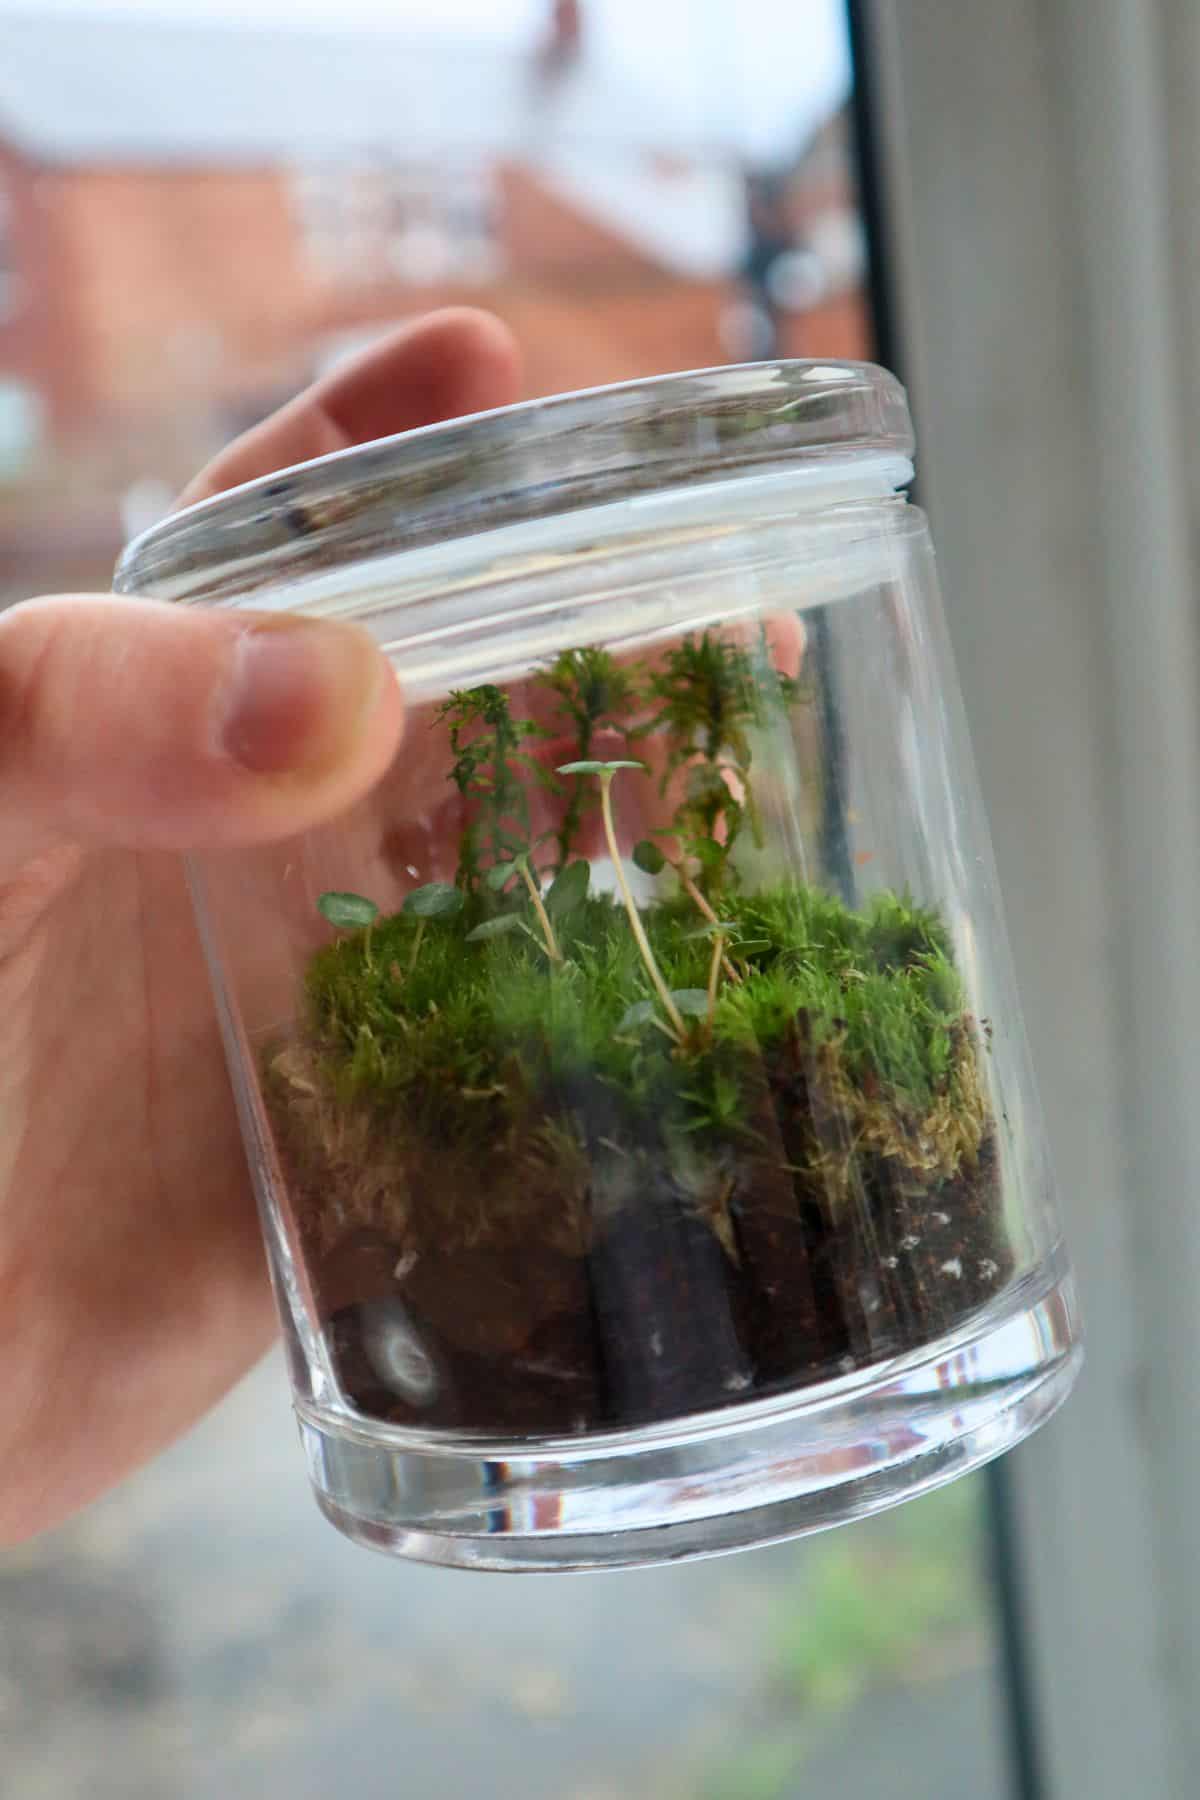
In my experience, small terrariums tend to work best when you keep the planting simple.
So I’d stick to just a handful of species, e.g., one type of moss, and one or two small plants (or realistically, cuttings of plants).
Closed Terrarium Ideas
Closed terrariums are where the classic “world in a jar” feeling really comes alive.
They’re best suited to tropical plants and mosses that benefit from stable humidity.
4. Bottle Terrarium
Bottle terrariums are one of the most classic closed terrarium ideas.
The narrow neck makes them feel more like little sealed worlds than regular jars, and that’s a huge part of the appeal. A good bottle terrarium looks like something that has been quietly growing on its own for years.
They do take a little (a lot) more patience to plant, though.

Access is limited, so bottle terrariums work best with small plants, mosses, fine tools, and a relatively simple layout.
You’re not going to be casually rearranging everything once it’s inside, so it helps to plan the scene before you start dropping things through the neck.
5. Jungle Terrarium
This is probably the best “proper terrarium” idea if you want something lush and unmistakably tropical.
Here we’re recreating the canopies of the jungle environment in miniature. A mix of vibrant green miniature plants in the understory, a network of winding vines, some textured ferns, and broad-leafed feature plants.
It’s less about cramming in as many plants as possible and more about creating depth

You can keep it simple with a few reliable foliage plants, or push it toward a mini rainforest with denser planting, creeping textures, and jewel-toned accents from plants like Fittonia or small Begonia species.
Fish tank terrariums can be a great fit for these types of layered environments (the extra depth really helps).
6. Woodland Terrarium
A woodland terrarium is often softer and more naturalistic than a bright jungle build.
Think mossy logs, small stones, leaf litter, bark textures, and little green plants tucked into the gaps. It should feel like a quiet patch of forest floor rather than a neatly arranged plant display.

In practice, a woodland terrarium is one of the easiest styles to make look mature, because imperfection is part of the charm.
7. Bonsai Terrarium
A bonsai terrarium uses a tree-like plant as the focal point.
It doesn’t have to be a formal bonsai in the strict horticultural sense. In terrarium design, the effect is what matters – a small trunk, mossy ground, and an ornate planting style.
By far the easiest “tree” (and the only one I’d actually recommend for a bonsai terrarium) is a simple Ficus ginseng.
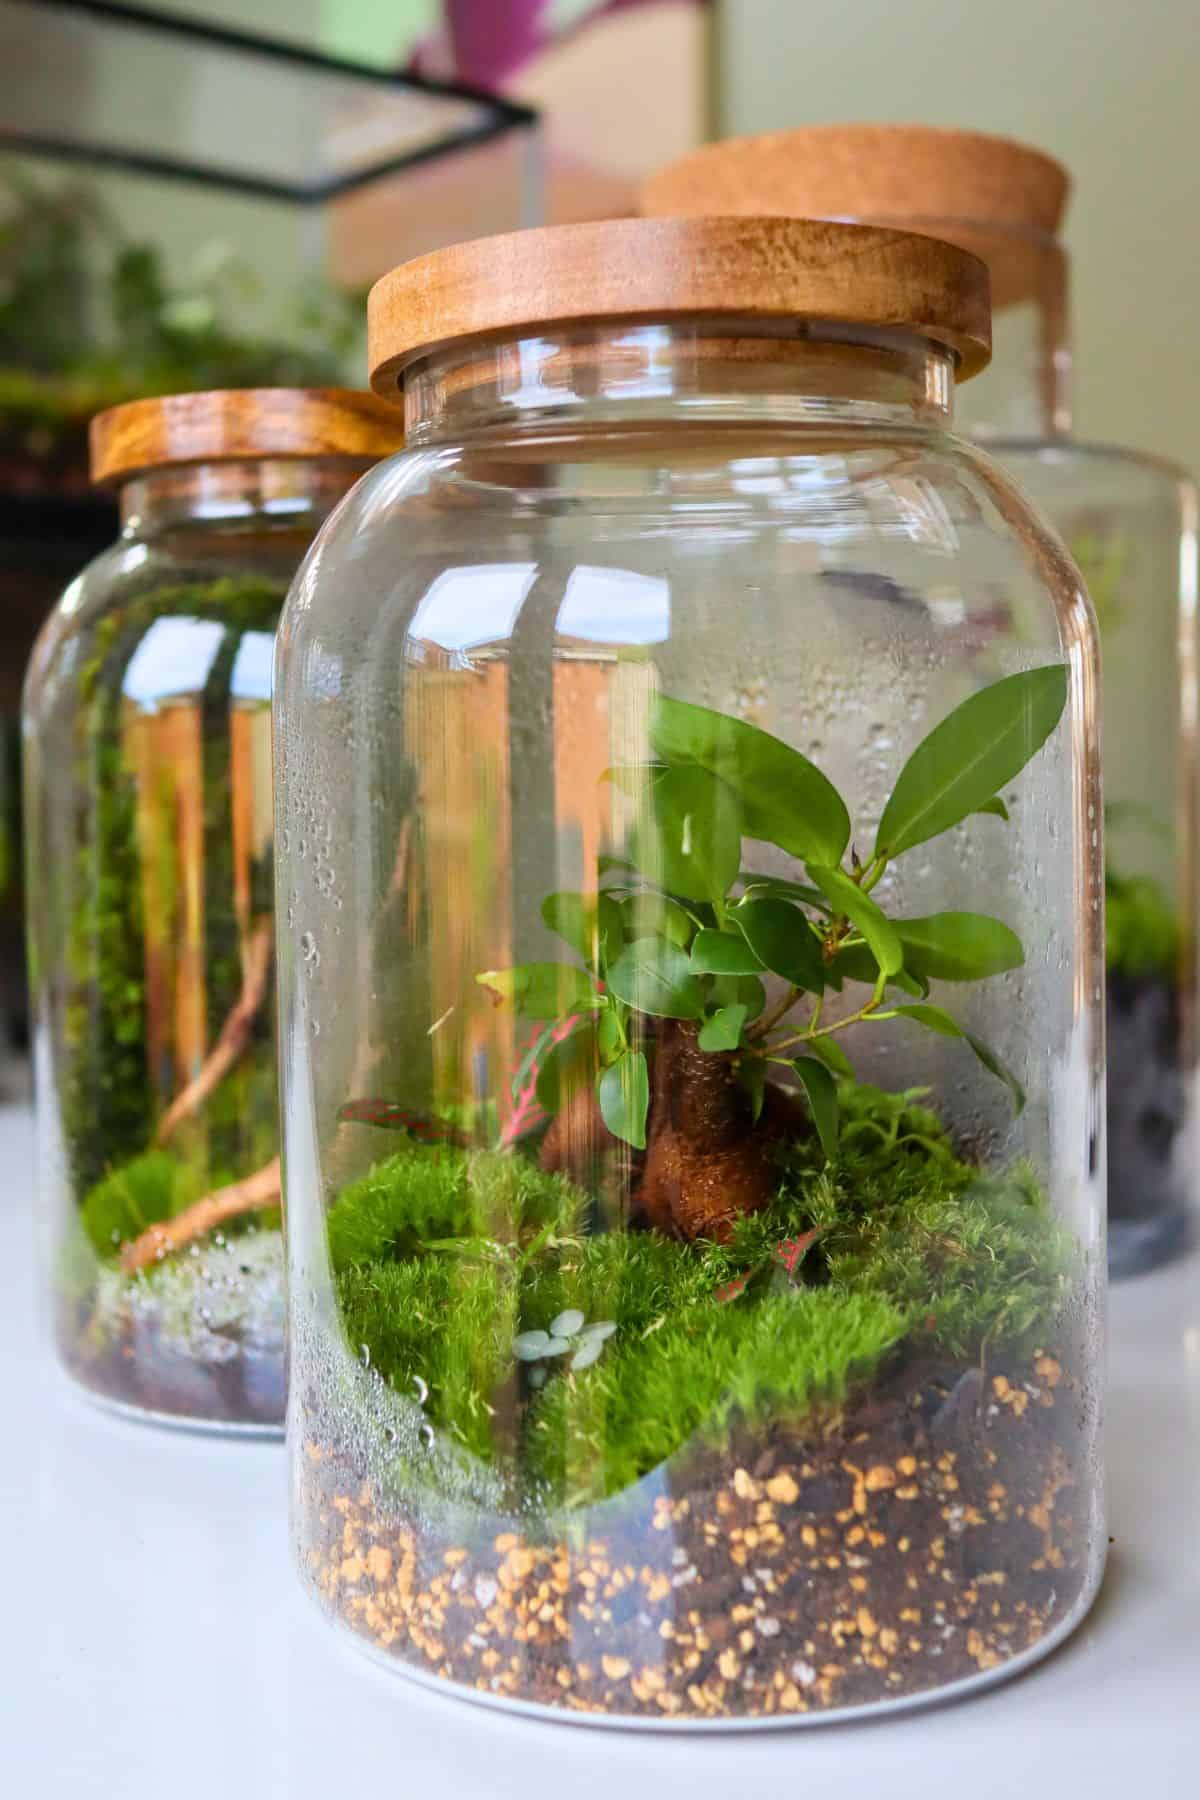
It already has that chunky little trunk, it handles humidity (and “wet feet”) better than most, and it gives you the bonsai look without any complex care requirements.
Open Terrarium Ideas
Open terrariums are usually better for plants that prefer drier air, brighter light, and a lot more airflow.
They can look fantastic, but you can’t just treat them as closed terrariums without lids. They require a different style of planting altogether.
8. Succulent Terrarium
Succulent terrariums are pretty easy to put together compared to a closed system, but that’s also where a lot of people go wrong.
Succulents need strong drainage, bright light, and plenty of airflow. That means they generally belong in open containers, not sealed jars. A shallow glass bowl or open dish is much more suitable than a lidded vessel.

Use gritty substrate, add a drainage layer (ideally), and water sparingly where possible.
9. Cactus Terrariums
A cactus terrarium follows the same logic as a succulent build.
Cacti can look incredible in shallow bowls with sand-colored gravel and some natural desert hardscape pieces. Just be careful with your planting (for obvious reasons).

10. Beach Terrariums
Whilst a bit more versatile, a beach terrarium is still closer to an open terrarium than a closed tropical build.
Sand, pale stones, shells, and driftwood can create a clean coastal look, but most tropical terrarium plants don’t actually want to live in a sandy beach environment.
The trick is to treat the beach elements as the visual layer, not the functional growing medium.
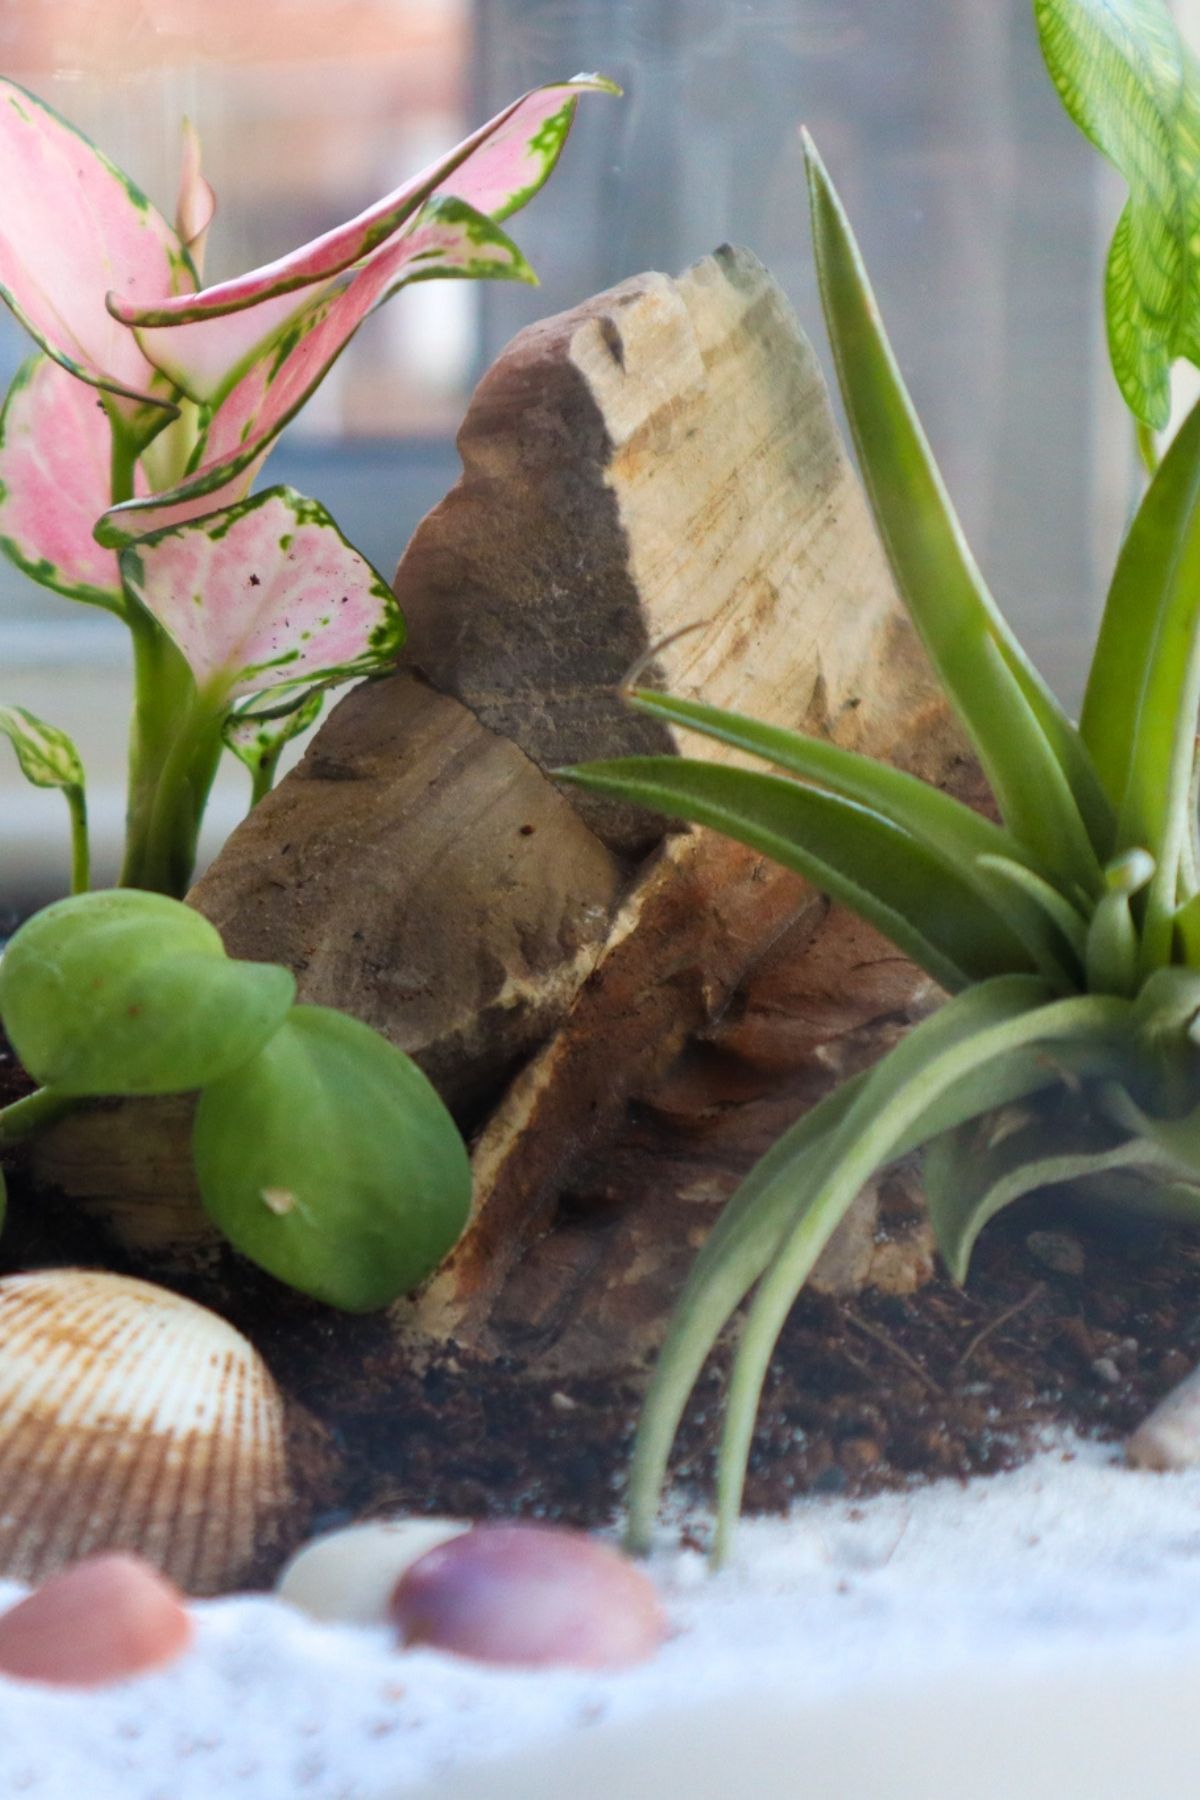
I tend to opt for more houseplant-like species for these projects.
The kinds of plants that would happily grow in a pot in your home are going to be just as happy in an open container. And semi-succulent plants like Peperomia are a good middle ground.
11. Air Plant Terrarium
Air plant terrariums are some of the easiest ideas to put together.
Tillandsia air plants don’t need to root in soil. So you can easily arrange them with larger hardscape elements. Anything with a natural twist or crevice is a good contender (and you can use superglue to get around even that requirement).
This makes them perfect for minimalist displays.
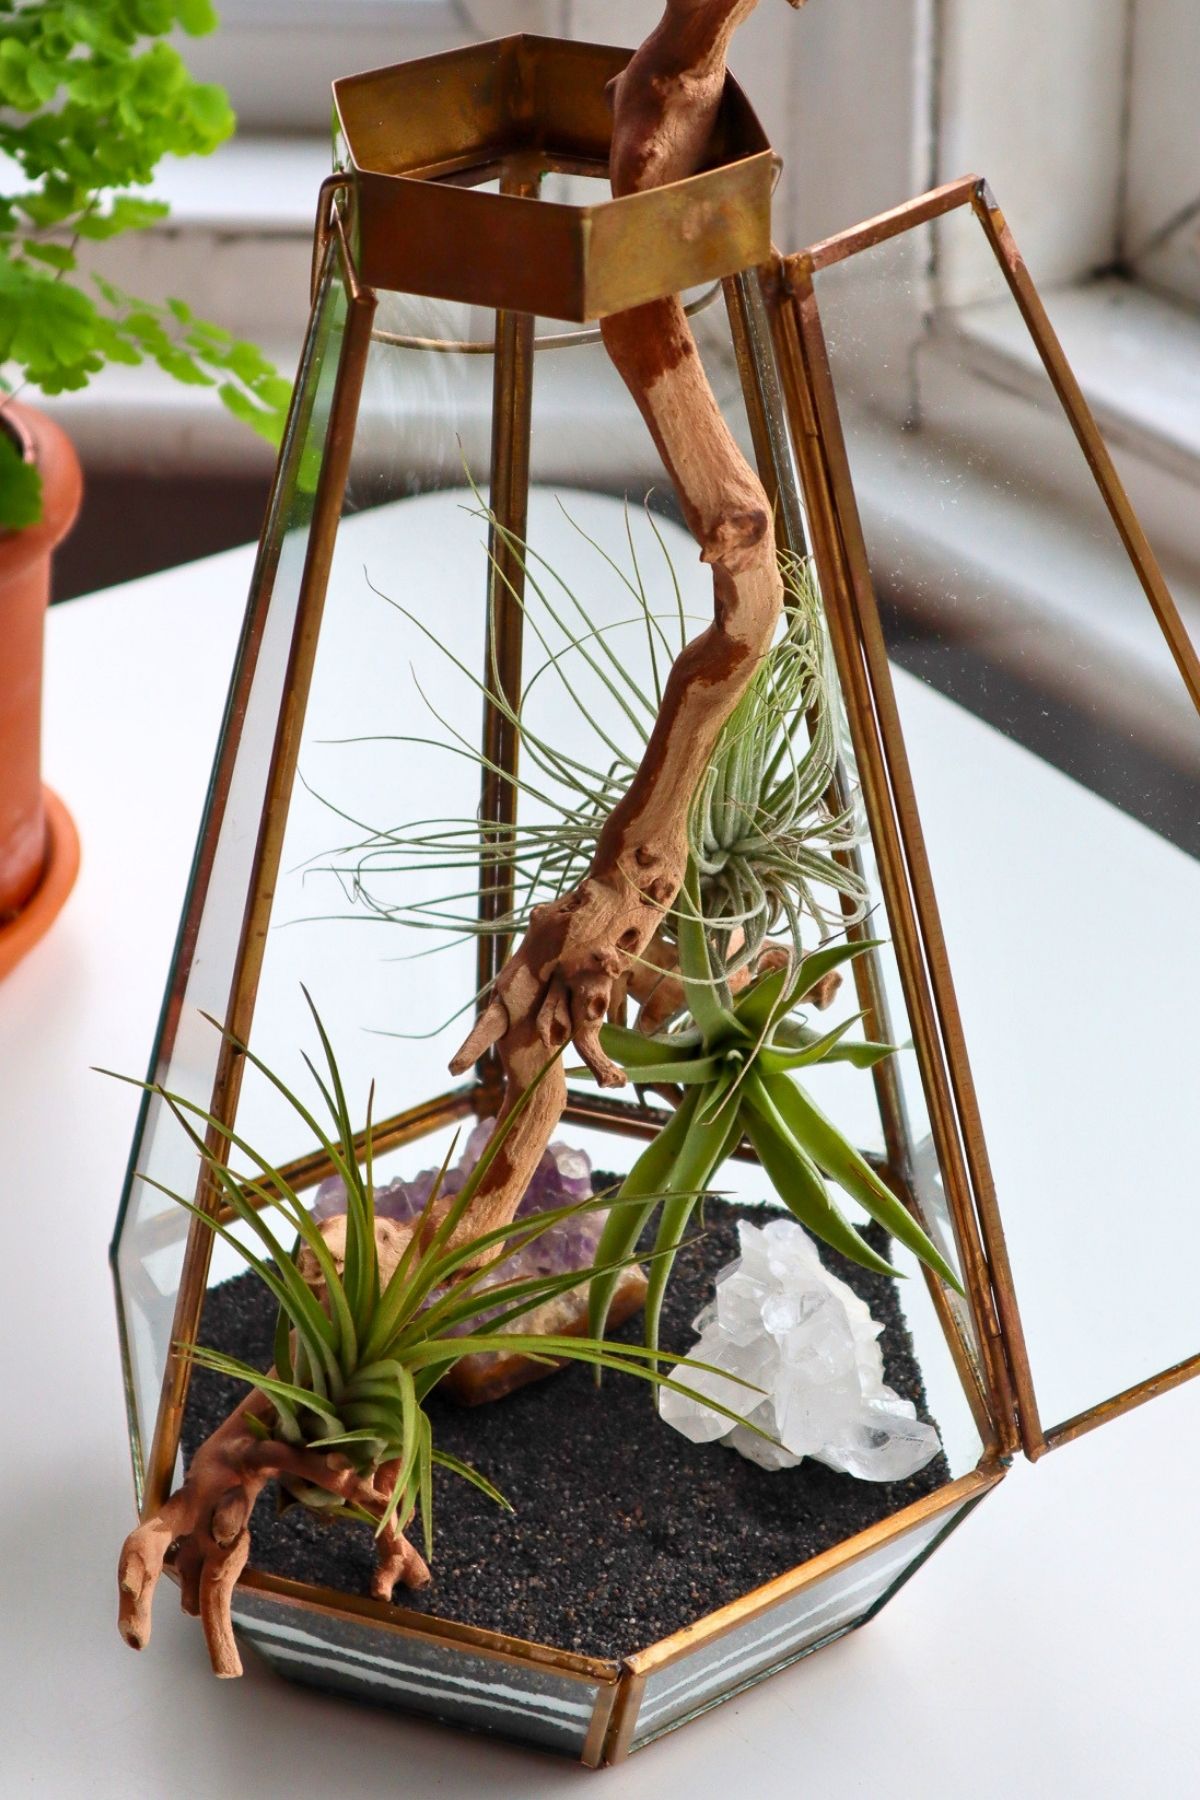
They still need care, but the terrarium itself is mostly decorative. Air plants need airflow, bright indirect light, and periodic soaking or misting depending on your conditions.
This is one of the cleanest terrarium ideas if you want the look without actually planting anything.
12. Carnivorous Plant Terrarium
Carnivorous plant terrariums are dramatic, strange, and surprisingly difficult to pull off.
*Definitely one to be attempted by experienced growers (or those looking to experiment a little).*
They’re best treated as open terrariums, not sealed tropical jars. Many popular carnivorous plants need a variety of unique conditions, from strong light, airflow, low-nutrient growing media, and very specific watering conditions.
That makes them quite different from the usual moss-and-fittonia terrarium formula.

Sundews and pitcher plants can all look incredible under glass, but they don’t all want the same conditions.
Venus flytraps, in particular, need bright light and a winter dormancy period, so they’re generally just a bad idea for terrariums (though we have tried making a Venus Flytrap Terrarium with limited success).
Moss Terrarium Ideas
Moss deserves its own section because it can carry a terrarium almost entirely by itself.
It’s not just filler. It’s texture, scale, softness, and mood all rolled into one extremely small plant-like package.
13. Mossarium
A mossarium is a terrarium where moss is the star.
This can be as simple as a single moss mound in a small jar or as elaborate as a full moss landscape with stones, slopes, pathways, rocky outcrops, and miniature valleys.
To get the best effect, moss terrariums use contrast.
Think soft moss against rough stone, bright green against dark wood, cushiony mounds against flat sheets. You can also push the style in a calmer, Japanese-inspired direction.
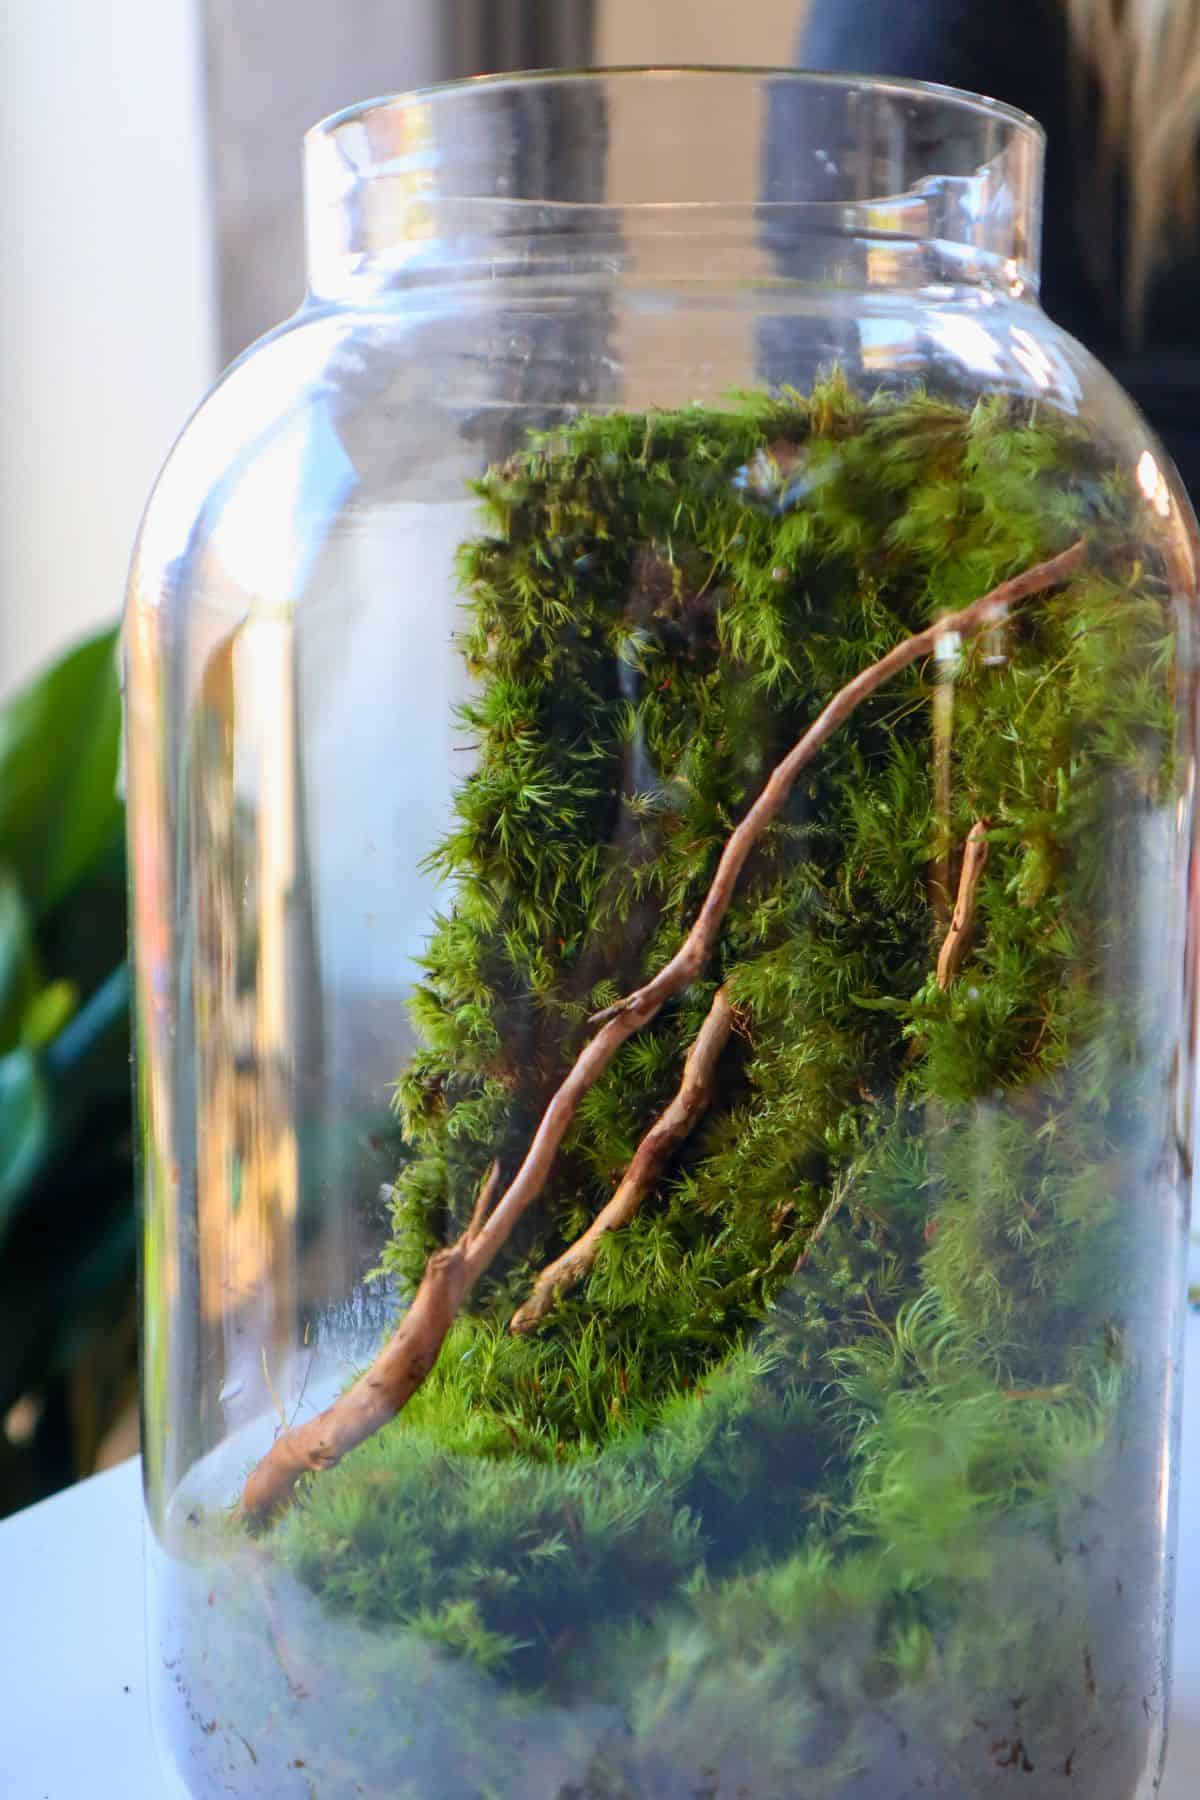
A mossarium is proof that a terrarium doesn’t need lots of plants to feel complete. The moss alone can carry the atmosphere.
Living Ecosystem Ideas
These ideas are a little more involved because they go beyond how the terrarium looks.
At their core, they’re more about how it functions.
14. Bioactive Terrarium
A bioactive terrarium uses tiny animals and microbes to help process organic waste and keep the system functioning more naturally.
In practice, that often means adding springtails, isopods, or both.
Springtails are the easiest addition. They’re tiny, efficient, and excel at feeding on mold and decaying material. Isopods are larger, more visible (and more hands-on), but they add a lot of life and personality to larger builds.

This doesn’t mean the terrarium magically takes care of itself forever.
You still need the right moisture, planting, airflow, and substrate. The cleanup crew helps, but it does not rescue a badly built terrarium from itself.
15. Paludarium
A paludarium brings land and water into the same display.
This can mean a small pool, a stream-like feature, a damp shoreline, or simply a biome that feels like the edge of a tropical riverbank. It’s more ambitious than most terrarium ideas, but it can create a much more dynamic scene.

There are practical challenges involved, though.
Depending on the complexity of the setup, water features may need easy access, cleaning (especially if you’re adding aquatic animals), and in some cases, proper separation from the planted areas.
More Creative Terrarium Ideas to Try
Not every terrarium idea needs a full section of its own – especially if it’s more of a display style, craft technique, or advanced build than a distinct planted system.
Still, these are worth keeping in your back pocket if you want to push a simple terrarium further!
- Hanging terrariums are great for air plants and small (likely preserved) moss displays.
- Terrarium lamps can turn a planted jar into a proper feature piece, especially when soft lighting brings out the texture of your moss and hardscape.

- Sand art terrariums use decorative substrate layers as part of the design, adding pattern and color through the glass before the plants even go in.
- Resin water effects can create miniature rivers, ponds, or waterfalls. Though they’re best treated as a proper craft rather than a casual add-on, they take a bit of skill to pull off.
- Fairy garden terrariums are a playful way to turn a mossy or woodland-style build into a tiny story scene, using miniature paths, figures, cottages, or decorative details
- Terrarium tables are the big statement piece once you’re ready for a serious project – part furniture, part planted display.
You Get the Idea
Terrariums sit in a lovely little overlap between plants, art, design, and biology.
You can keep things simple with a tiny moss jar, go classic with a closed tropical scene, build a clean, open succulent bowl, or take things much further with lights, tables, resin water effects, and living cleanup crews.
You can mix and match too (within the same conditions).
A woodland build can be bioactive. A hanging terrarium can use air plants.
Find a direction, choose plants and materials that actually suit it, and build something that feels like a little world of its own.