When I think of the woodlands, the first thing that comes to mind isn’t the vibrant beauty (though that does shine through) but rather the thick, earthy scent and eclectic soundtrack of the buzzing life inside.
It’s the entire sensory experience that makes the environment so enchanting.
It might be a bold statement, but I think it’s that exact essence that should be encapsulated in a woodland terrarium.
Of course, it’s impossible to build a terrarium that sounds like a forest (though we can get the smell pretty spot-on). But we can still be inspired and take on the challenge of recreating its majesty in miniature.
So stick with me in this article, and I’ll teach you how to create your own little slice of serenity.

DIY Woodland Terrarium: Step-by-Step
To create a truly luscious woodland terrarium, you’re going to need plenty of moisture-loving plants, and ultimately, they will dictate the kind of terrarium build we’re going for.
An open terrarium would look fantastic for a week before turning into a dry, brown wasteland, which is a little too harrowing for me.
So, for this kind of project, a closed terrarium is the best option. After all, the goal is to create an entire ecosystem (albeit a miniature one), isn’t it?
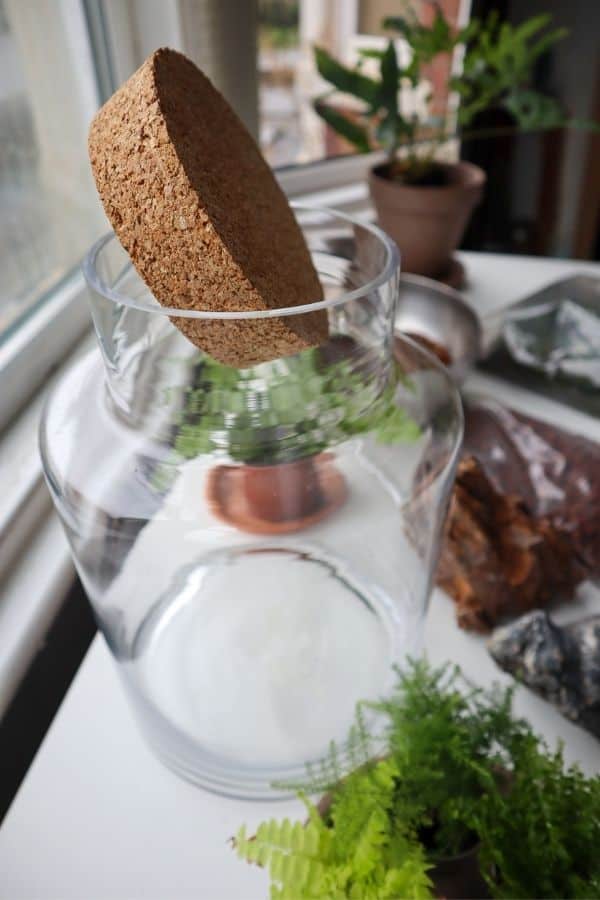
For most of my terrarium builds, I use thrifted glass containers that don’t come with lids and solve the problem by buying a cheap perspex lid online.
Now, let’s get our hands dirty.
Terrarium Layers – Creating the Base
Before creating our canopy or even the forest floor, we need to start with the bedrock.
We’ll be using lots of water-loving plants in this project, so I’ve decided to use a drainage layer, aka, a terrarium false bottom.
This way, any excess water has somewhere to pool, and I feel confident giving my terrarium a good drink without the risk of completely waterlogging the system and damaging the plant’s roots.
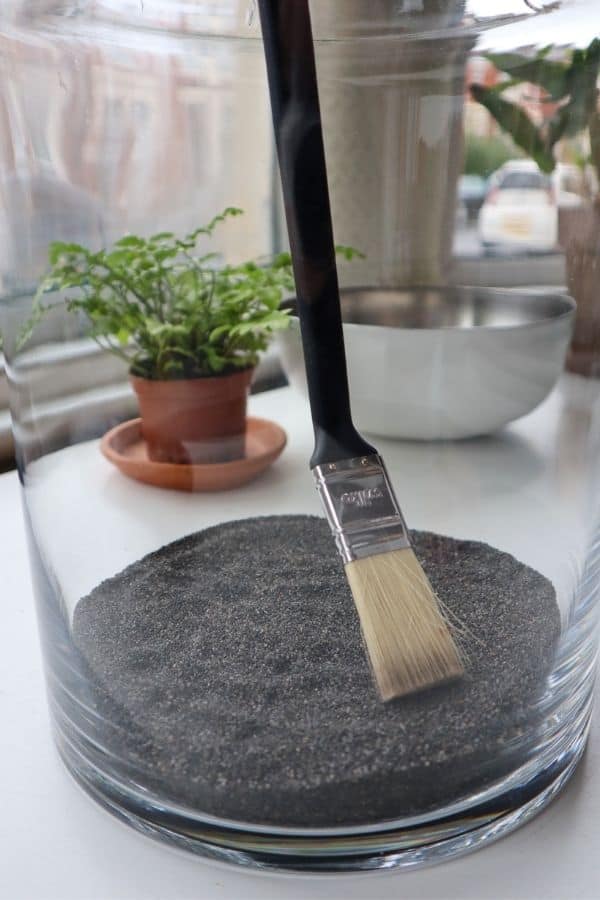
So, I begin the base of my terrarium by adding a layer of aquarium sand to my container (though we typically recommend using leca clay balls) and smoothing it out with a paintbrush.
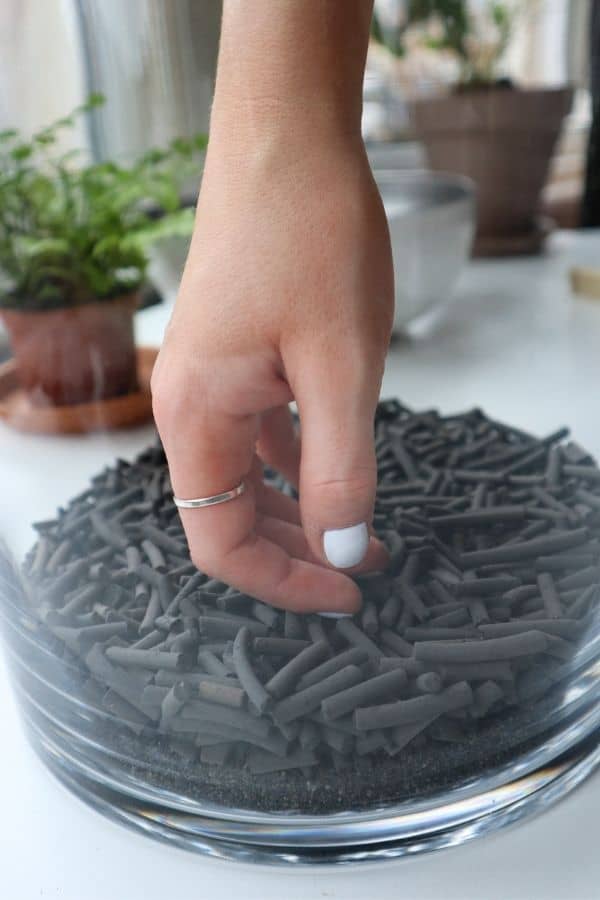
Next, I added an activated charcoal layer.
Why, you ask? Well, beyond the fact that I was about to move house and wanted to use up my excess material (can you blame me?). My layer of sand was on the thin side, and charcoal both boosts drainage and has potent filtration properties.
Honestly, it’s hard to quantify exactly how helpful activated charcoal is to the health and longevity of a terrarium, but it certainly won’t hurt.
If you’re going for a drainage layer – or layers, like me – aim for a total depth of around 1-1.5 inches.
Terrarium Substrate + Hardscape
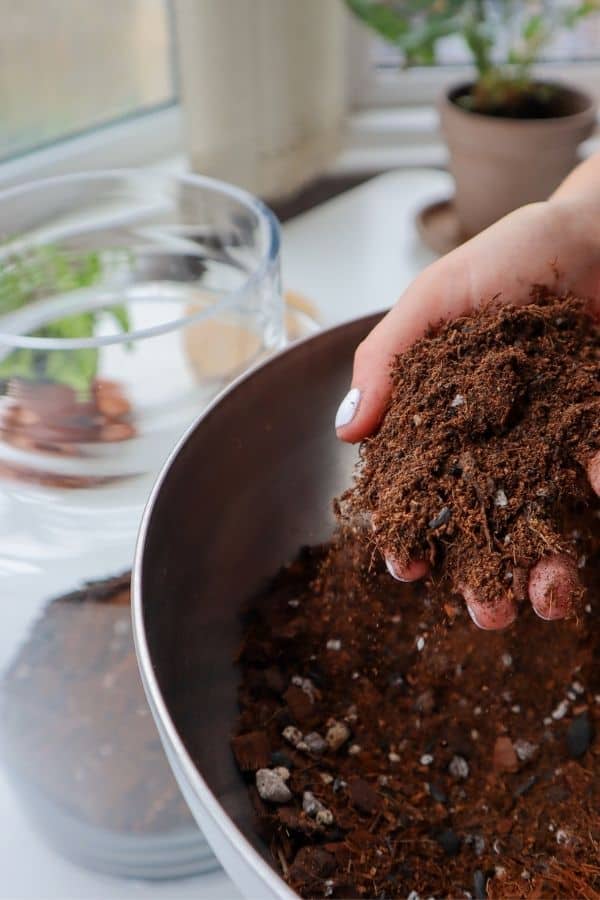
Now, the task of creating the earth from which our forest will grow.
Much like it would be in a natural woodland environment, the substrate needs to drain well, retain moisture, be nutrient-rich, resist compaction, and provide plenty of root aeration.
While it might seem like a big ask, the world of horticulture has solutions.
The mix I’m using on this project has a moisture-retaining coco coir base and earthworm castings for a natural fertilizer, and it’s supplemented with pumice, tree fern fiber, and orchid bark for drainage and aeration.
Our terrarium substrate mix is pretty similar.
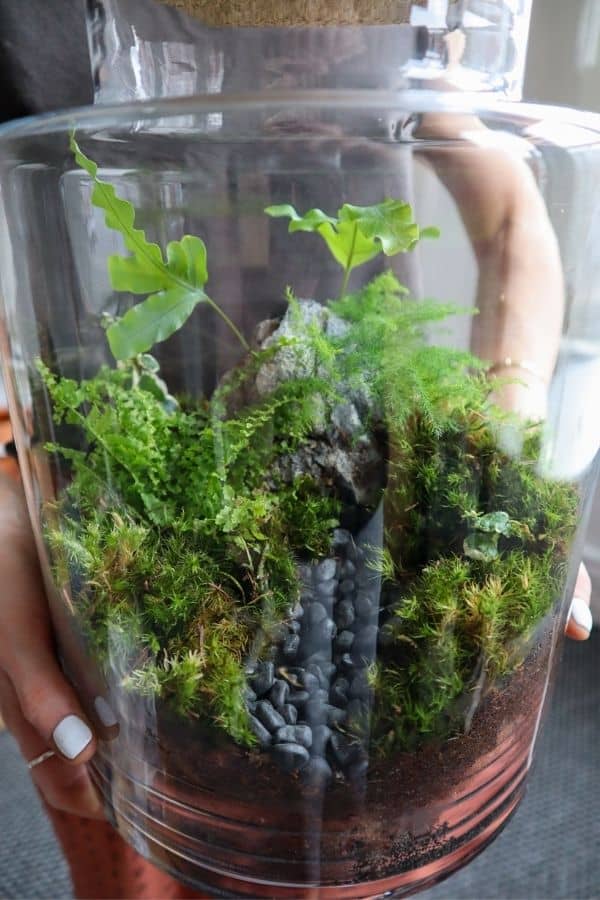
Now, it wouldn’t really be an authentic scene without rocks and wood, would it? That’s why I recommend at least one hardscape element for every build.
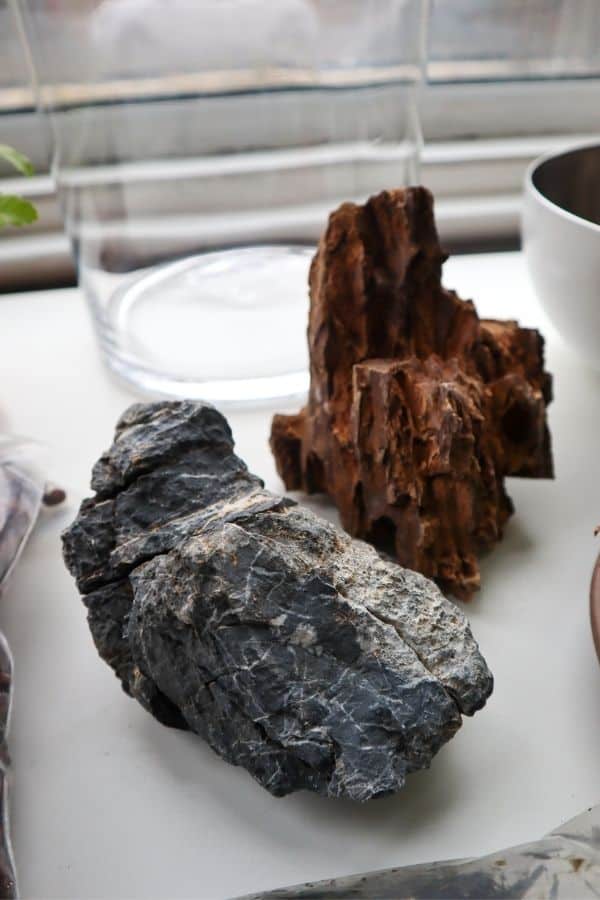
I always find it easier to place my substrate and hardscape at the same time. This helps to anchor the hardscape element to keep it secure. No squished plants here.
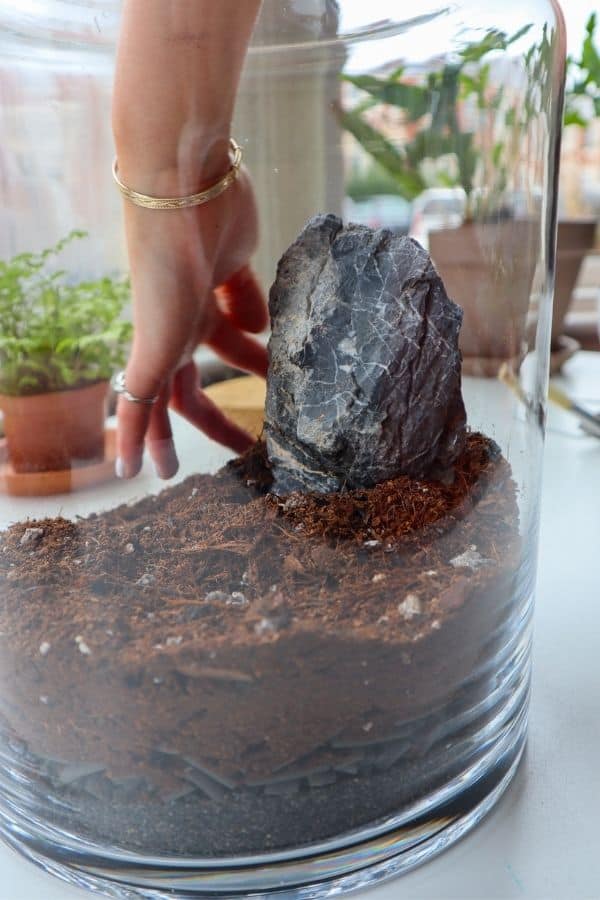

Just make sure your substrate layer is big enough to support your plants’ roots.
Woodland Terrarium Plants
For this particular build, my main goal in selecting terrarium plants was to have tonnes of texture and contrast. Lots of my choices can grow quite large over time, but for me, that leans into the woodland wilderness aesthetic.
I’m using:
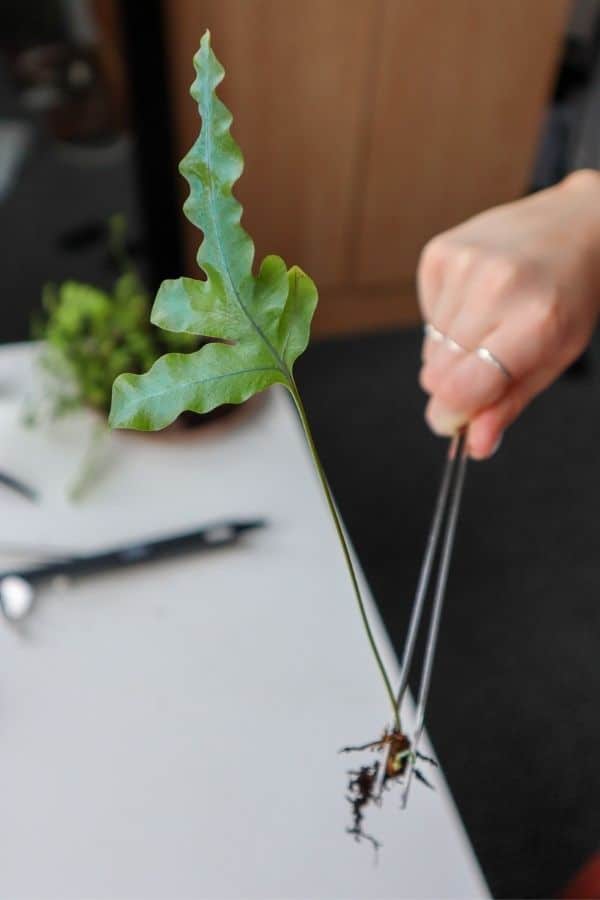
- A few Blue Star Fern fronds.
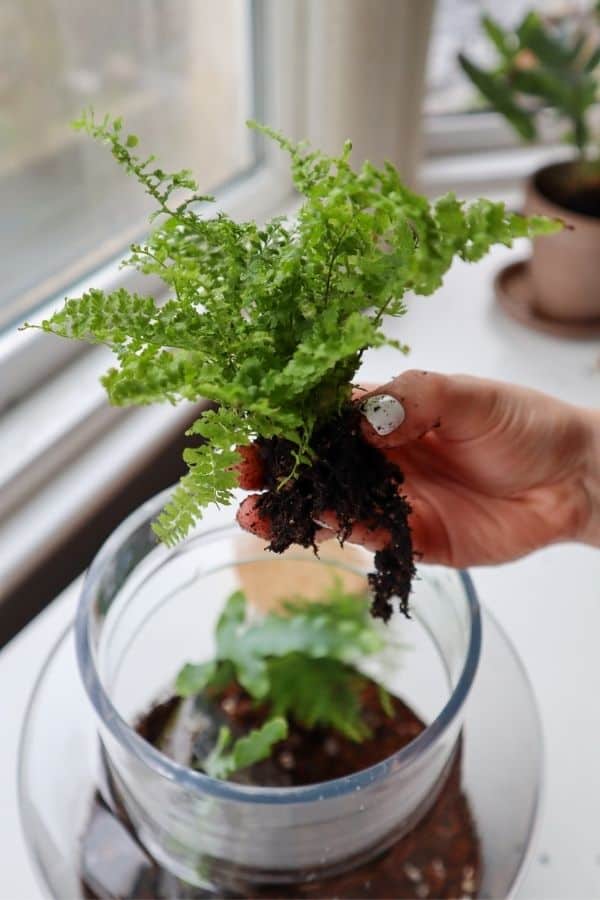
- Asparagus Fern.
- Fluffy Ruffles Fern (Nephrolepis exaltata – a miniature Boston Fern).
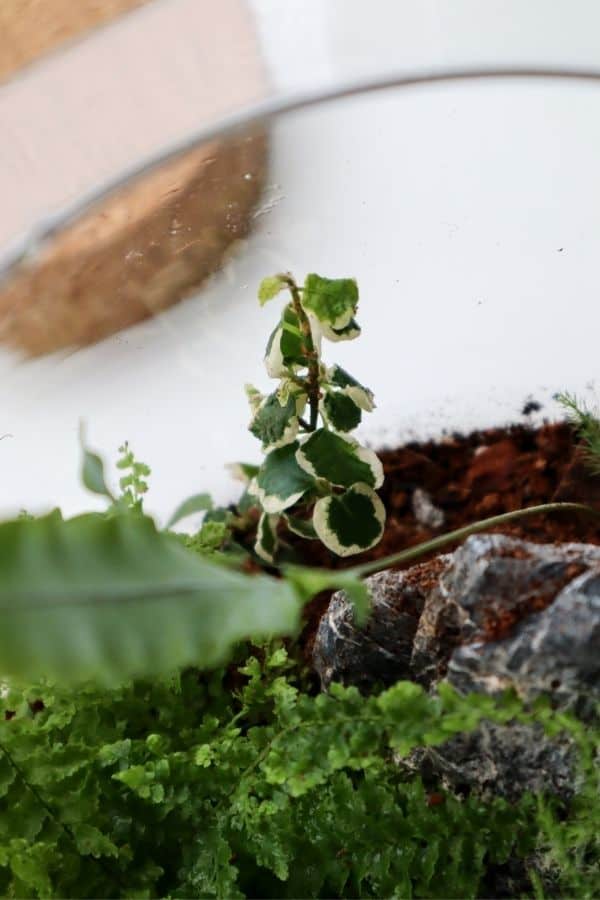
- Some lovely variegated Ficus pumila cuttings.
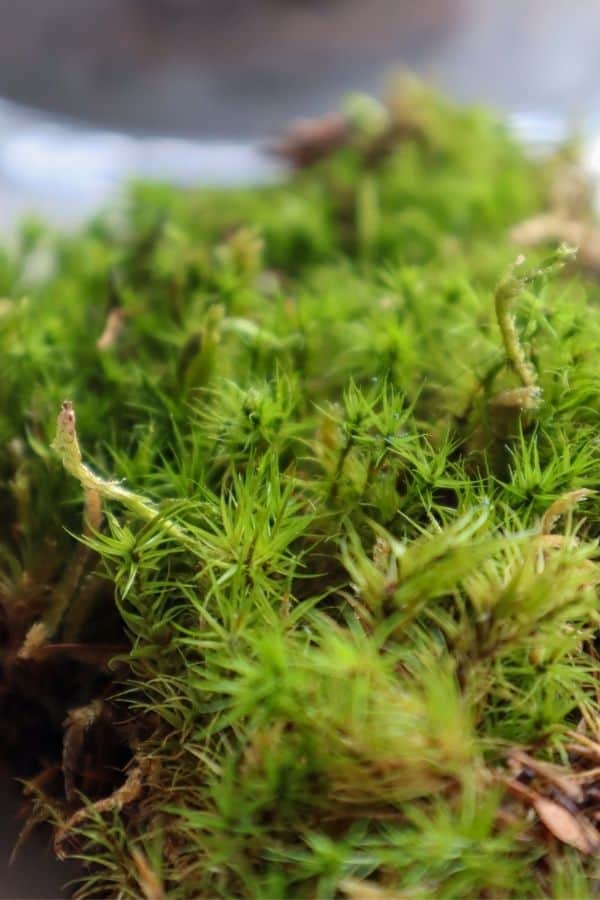
- Mood Moss (Dicranum scoparium).
Planting & Creating the Scene
It’s time to bring it all to life.
Begin by giving the substrate a light spray of water – moist soil is a million times easier to work with, trust me.
Then, get to planting. Create a rootball-sized depression with your finger (or a terrarium tool), pop the roots in, and smooth the substrate around to secure it.
I went in with the fluffy Asparagus Fern first, followed by the Blue Star Fern, which I wanted to plant behind the stone to give the illusion of a towering tree. Plus, being my largest plant, it pays to plant it earlier to get that immediate sense of scale.
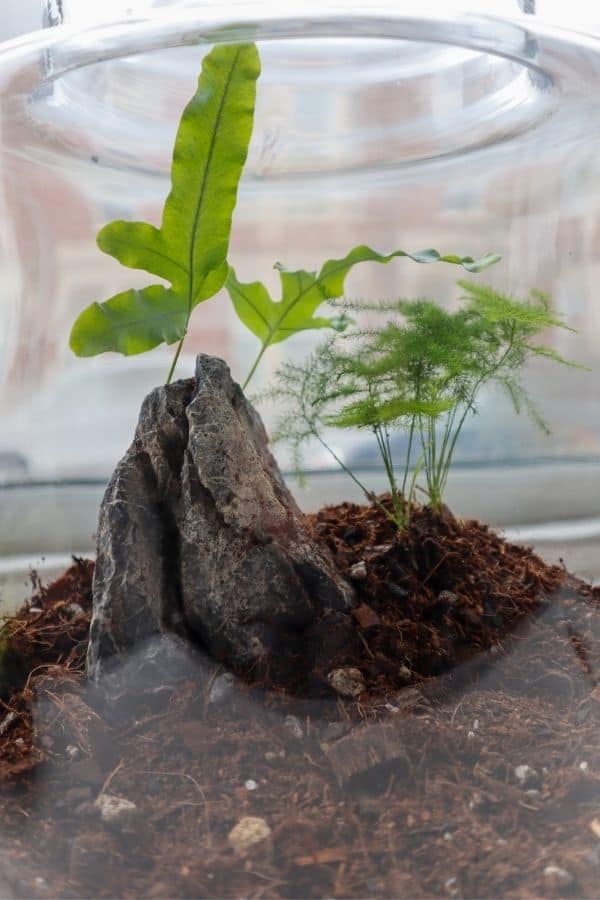
When I was happy with the placement of all of my ferns, I popped my Ficus cuttings around the terrarium to add some extra character.
Moss & Finishing Details
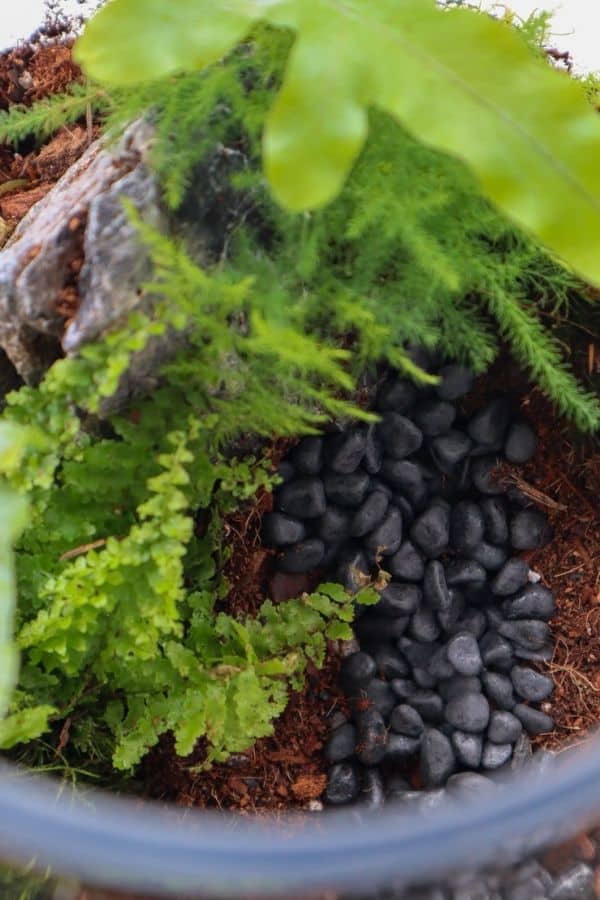
Before I added my moss, I decided I wanted to create a little ravine with – you guessed it – some little pebbles I had leftover from another build.
I gently placed them across my substrate to mimic a babbling stream from high to low.
Now for the final touch: moss.
It can be pretty fiddly, but you’ll need to trim away the brown excess before placing it. Break off a clump of moss and pinch the fluffy green side together as you snip away the brown side. Then, you’re free to place it where you like.
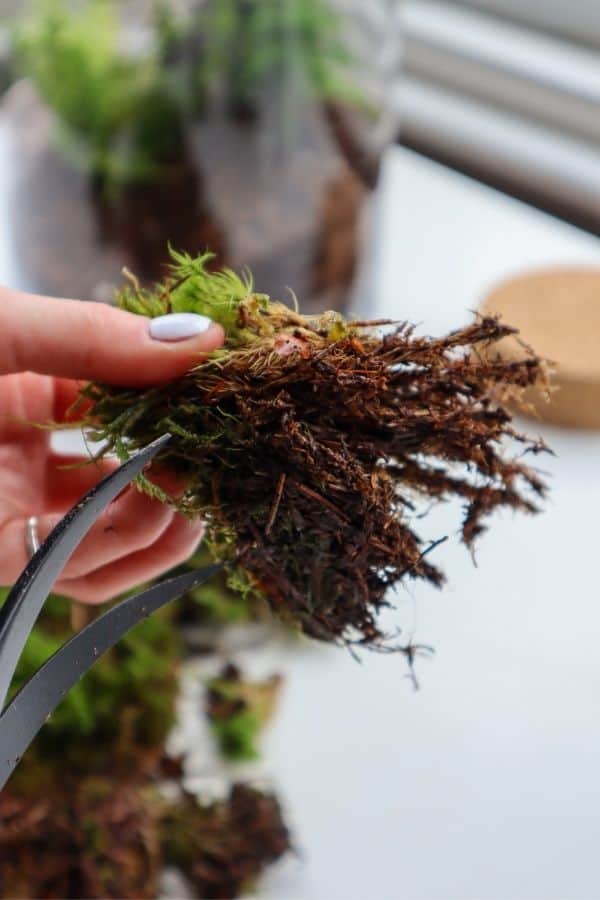
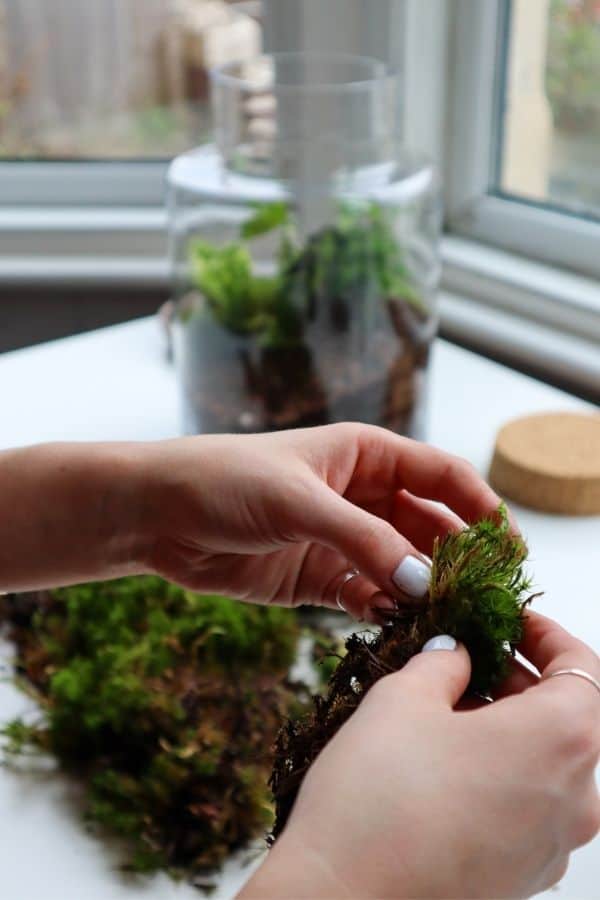
You can use these tufts to create a full ground cover or dot them around in clumps. Both ways would look fitting in a woodland scene.
I haven’t done it in this project, but if you want to level up your build, you can attach aquatic moss (like Java Moss) directly onto the hardscape for it to grow across as it would in the forest.
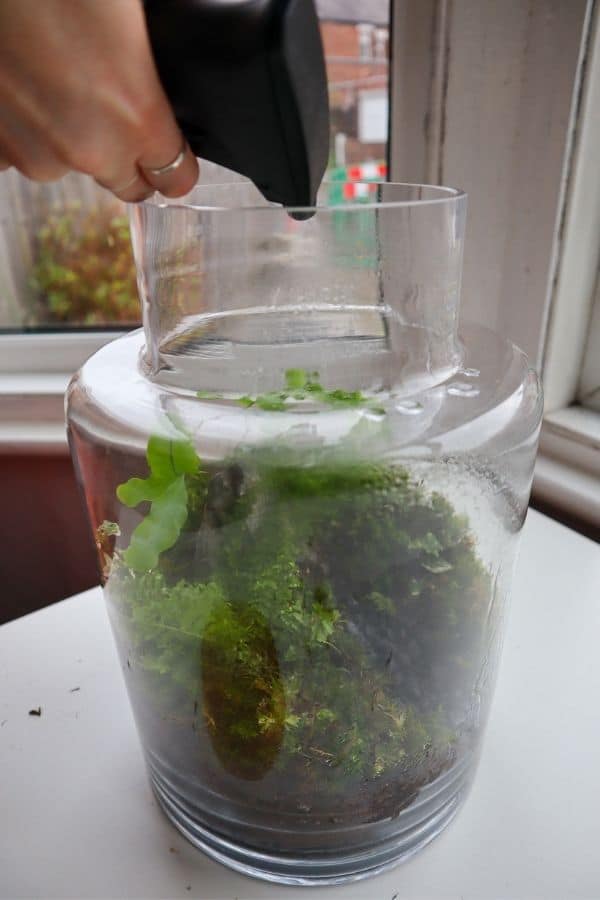
Give it a spray of water and seal that baby up! It’s always best to err on the side of caution when it comes to watering. You can always add more, but it’s hard to remove if you overdo it.
Woodland Terrarium Care
Now you’ve completed your masterpiece, your next challenge is to keep it alive and well.
Thankfully, your new sealed setup will generally take care of itself – a hallmark of well-balanced closed terrarium foundations. Phew!
While sealed ecosystems don’t need constant watering, they might need topping up with a few sprays now and again, so keep an eye out for any typical signs of underwatering.
I always aim to have moist, but never soggy, substrate.
Your terrarium will appreciate a nice bright spot in terms of lighting conditions, but keep it out of direct sunlight so the leaves don’t scorch.
Lastly, if you have any issues with mold (or simply having an amazing plant terrarium isn’t enough), you might want to consider turning your terrarium bioactive and adding in some springtails – tiny little bugs that eat decaying matter.
That’s it From Me
I hope you’re thrilled with your creation. I thought I was a tropical terrarium lover, but I must admit the woodland theme has stolen my heart.
Check out my post for more natural terrarium ideas (that work) for more inspiration.
Just got back from a trip to the redwoods and upon returning home, was inspired to create an enclosed bit of forest magic for myself: a terrarium! I haven’t made it yet, but I really enjoyed your article and will definitely be back for more once I get started!
I decided YESTERDAY to create a terrarium and VOILÀ I find the wonderful article that you have written. Easy to follow instructions in layman’s terms, pictures to appreciate the instructions AND BEAUTIFUL CREATION. I NOW feel confident to create my own terrarium. Thank You very much to the person who wrote this guide and for getting it published.
I’m planing to turn my aquarium tank into terrarium, but I have a problem: it has a lid, but it is not fully covered. Would it be a big problem for this lovely fern & moss terrarium?
You’ll likely have a harder time growing moss and ferns without the full benefit of a sealed terrarium’s humidity but it can be done. You’ll just have to mist it more often.