Creating water is no longer reserved for Poseidon himself; now we can do it too!
Bobbing about at the intersection between terrarium building, flower arranging, and diorama, it’s easy to see why fake water is loved by all – its authentic appearance.
But take its realistic look with a grain of (sea) salt – it’s a challenging craft to pull off.
In this post, I’ll take you through every step of the process, what to use and what to watch out for.
So whether your next terrarium project is calling out for a dainty little water stream, or a pool of dark deep water, you’ll feel confident in your ability to execute a fantastic design.
Take your shoes and socks off kids; we’re going for a paddle.

Terrarium Tribe is reader-supported. When you purchase through links on our site, we may earn an affiliate commission (at no further cost to you). 💜
Fake Water DIY: Using Resin for a Water Effect
While there are several different methods of creating artificial water for craft projects, epoxy resin is the material that reigns champion.
It’s a clear liquid plastic that slowly becomes solid in the presence of sunlight after a chemical hardener has been added to it. It’s helpful to think of the hardener as an activator.
Without it, the resin can’t cure and would remain a liquid, even with all the sunlight in the world.
It’s durable, transparent, readily available, and can realistically replicate the appearance of water.
These qualities make it the perfect medium for your next terrarium project.
Now we have that covered, let’s dive straight into the materials you’ll need to make your watery paradise come to life.
Artificial Water Supplies – What You Need
- Epoxy resin and hardener. Naturally, the first thing you’ll need is a resin and hardener, which are helpfully sold together.

- A cup to mix in. One that you don’t eat or drink from, please (for obvious reasons).
- Something to stir and mix with. Most people use lollipop sticks, but in theory, it could be anything that won’t interact with the resin and won’t go in your mouth.
- Digital gram scale like this one on Amazon. For smaller projects like terrariums, the measurements of resin and hardener need to be more accurate, so the internet seems to agree that scales are essential.
- Hot glue gun. The resin and planted areas need to be completely separate, so hot glue is used to seal the sections (any gaps would allow the resin to leech into the substrate and destroy your plants). And for advanced projects, hot glue can be used to build unique shapes, such as a waterfall.
- Your usual terrarium supplies. I almost forgot – you need a terrarium container, decorative stones, and rocks to build your sections, appropriate substrate, drainage material, and plants. Check out the terrarium supplies on our store for all those needs.
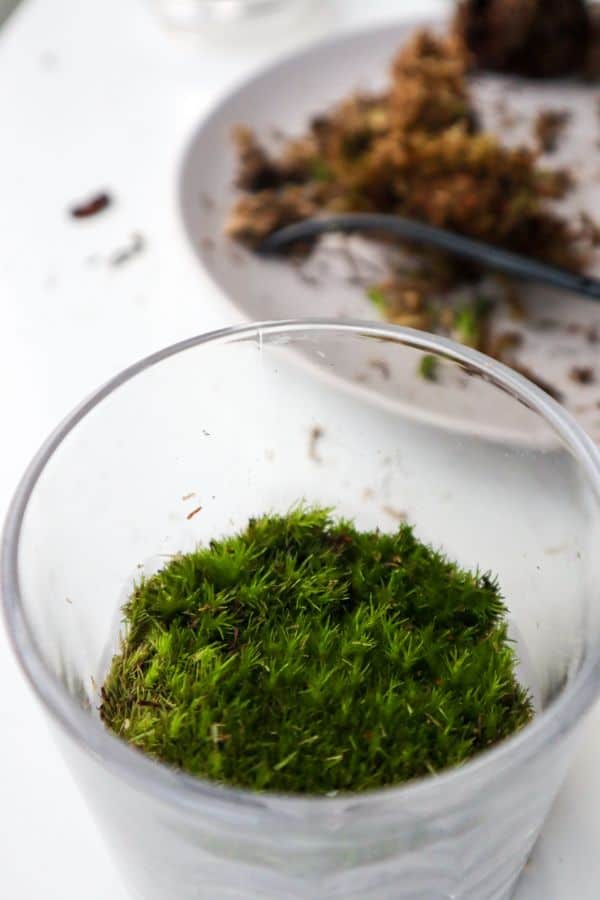
You’ll need to decide whether you’re building a closed terrarium with a lid, live moss, and tropical plants or an open terrarium with arid plants and no lid.
Of course, you could do this whole project with fake plants, but to me, this entire project is about bringing artificial and natural elements together in harmony.
And real plants are so much better than plastic. Yes, I’m biased, but I’m also right. 😉
Things You Might Also Need
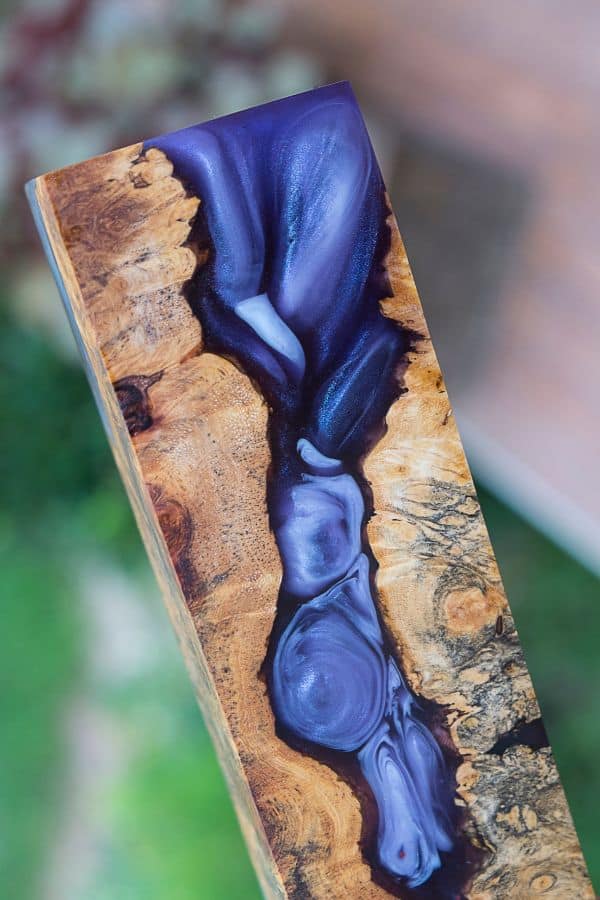
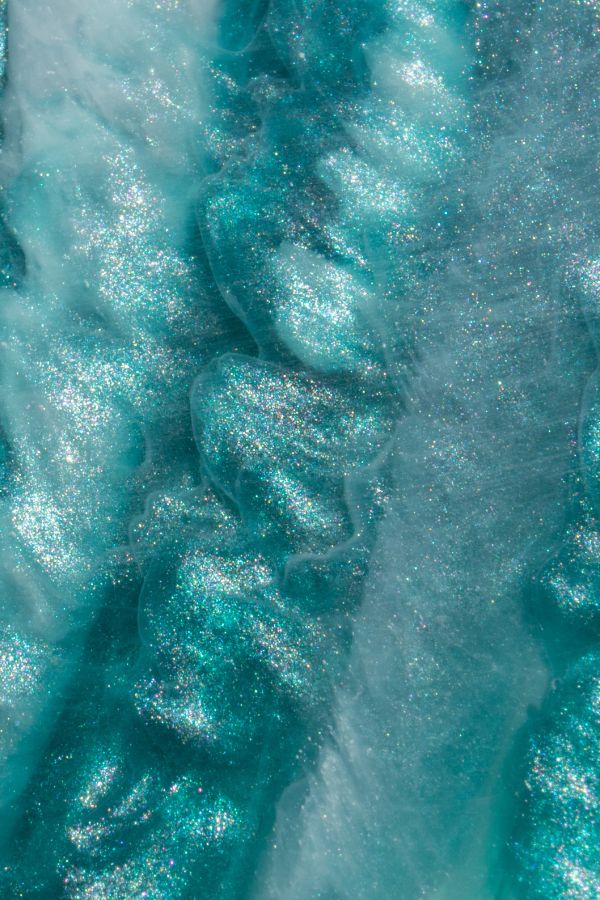
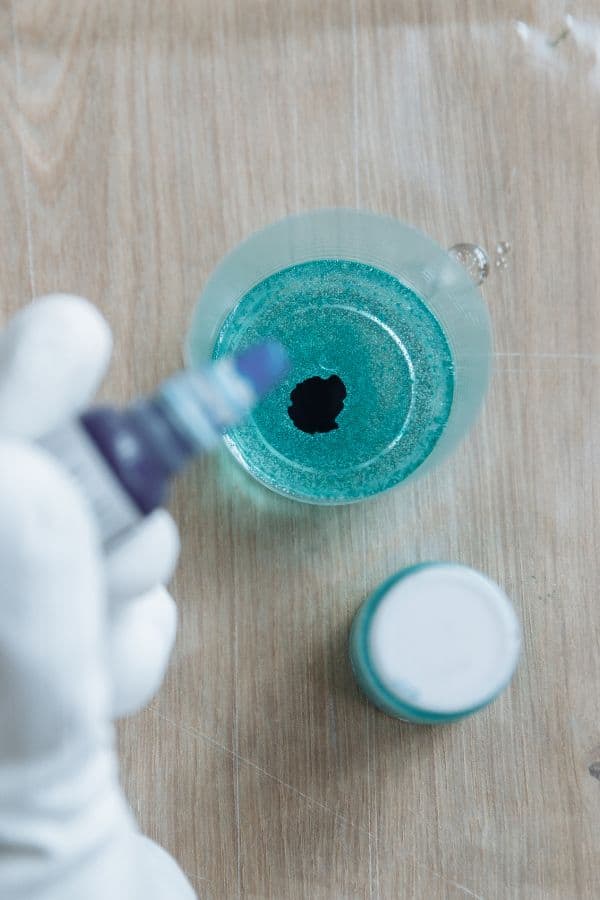
- Resin dye. If you want to add color to your resin, you’ll need resin dye. Blue, green, and white are the best colors for bodies of water, but the options don’t end there. How about using red dye for lava?
- A Paintbrush. For more challenging faux water features (specifically something that isn’t flat so the resin can’t be poured), first, create the shape with hot glue, and once dried, use a paintbrush to apply resin directly.
- Additional extras. Beach huts, boats, marine life, explorers, glitter, you name it. Whatever additions or miniatures you might fancy to bring your scene to life.
How to Make a Fake Water Terrarium
Because any liquid resin would damage your plants, it’s a good idea to begin with the water effect.
Of course, this will vary a lot depending on what you’re going for, but for a basic design, work out where you want your body of water to go and section it off with rocks or pebbles.
Whip out the trusty glue gun and make sure that thing is (fake) watertight.
Once you’ve done that and it’s dried, it’s time to add the good stuff.
*A quick note – the toxicity of epoxy resin is a little debated. Some sources say it’s FDA-approved, and some sources say that the inhalation of fumes could potentially be harmful. Though my understanding is you’d have to have extreme long-term exposure to have any issues, I’d still recommend working in a ventilated space.
Creating the Artificial Water
The first thing you need to know is that if the layer of resin is too thick, it could crack as it sets. Which really ruins the aesthetic…
The product you have should state the maximum layer depth in the instructions on the bottle, but generally speaking, the trick is to go for thinner pours and more layers.
So grab your cup, scale, resin, and hardener and measure out how much you need of each according to the ratio on the bottle (it varies from brand to brand). Remember, you’re not making enough to fill the entire section, just a small layer.
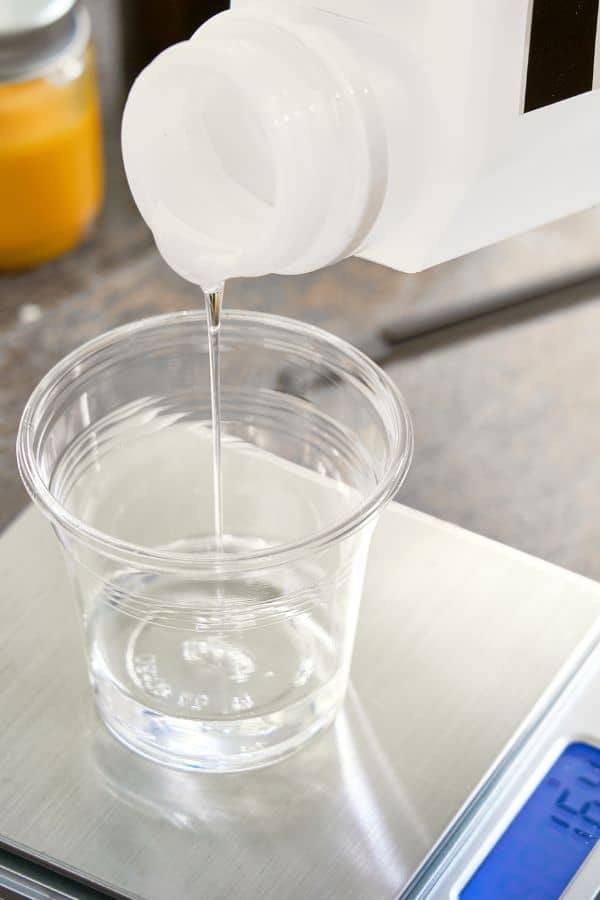
Then mix the resin and hardener, add any dye and/or glitter you’re using, and continue until it is thoroughly mixed. Dyes are highly concentrated, so start small (e.g., one drop).
Top tip. Make sure you add the same amount to each batch to avoid the layers being different shades.
Once everything is mixed, go ahead and pour a layer of resin mixture, being careful to keep it in the allocated section only, and leave it to harden over its curing period – usually 24-48 hours, but it varies from brand to brand.
Then, rinse and repeat with each layer of resin mixture over the coming days until your body of water is complete.
Too Much Effort?
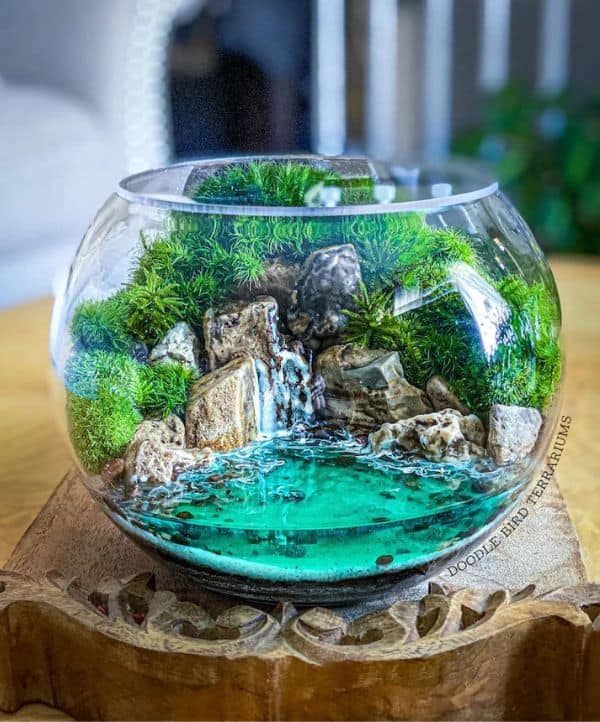
If all of this sounds like a little too much effort (I wouldn’t blame you), you can purchase pre-made terrarium waterscape kits directly from the expert herself, Patricia, at Doodle Bird Terrariums.
It’s a great shortcut option and certainly worth looking at if you don’t have the time that resin demands.

Building the Terrarium
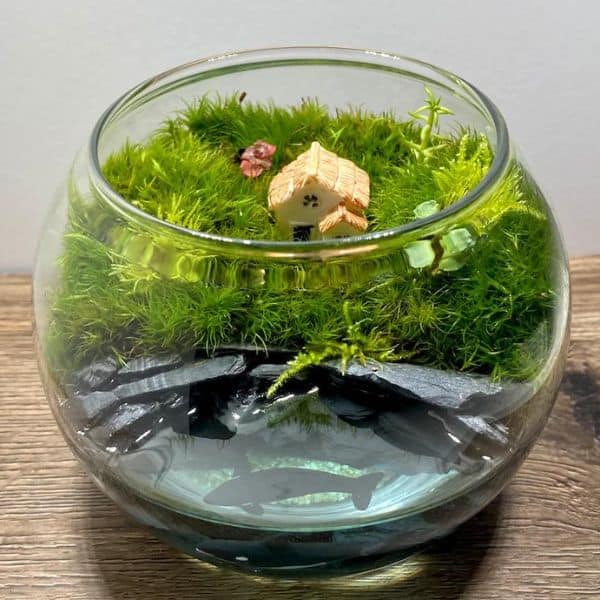
Whenever your resin reservoir (see what I did there?) is complete and fully set, you can build your terrarium in the other section. Fish bowl terrariums appear to be common, and they certainly fit the brief.
Add an inch of drainage material, then enough substrate for your plant’s roots, and get planting.
Once it’s fully built, give your plants and any living moss a few sprays of real water. And you’re done!
If it’s a closed terrarium project, pop the lid on and place your terrarium in a spot that gets bright indirect light.
That’s it For Today
Are you happy with your creation? If you want to show it off, be sure to tag us in a picture on Instagram. And if you have any tips for artificial water effects, be sure to share them in the comments. x
thank u
it was very helpful guide
merav
israel