The mason jar terrarium is a humble horticultural icon.
A perfect example of a closed terrarium that anyone can put together at home, using a common glass kitchen container and minimal tools/materials.
For this guide, we’ve built a gorgeous terrarium in a jar as an example, with just a handful of tropical plants and mosses. It’s a simple and straightforward build, but the final results look very elegant (if I do say so myself).
So, we’re going to take you through the entire process step-by-step so that you can make your own.

Jar Terrarium DIY Materials – What You’ll Need
Container
Mason jars come in various styles and sizes, and honestly, they should all work just fine for a terrarium. Provided they’re made of clear glass and have a wide enough opening to work in.
The screw-on lids do tend to form a better seal, but being completely airtight is not a concern at all.
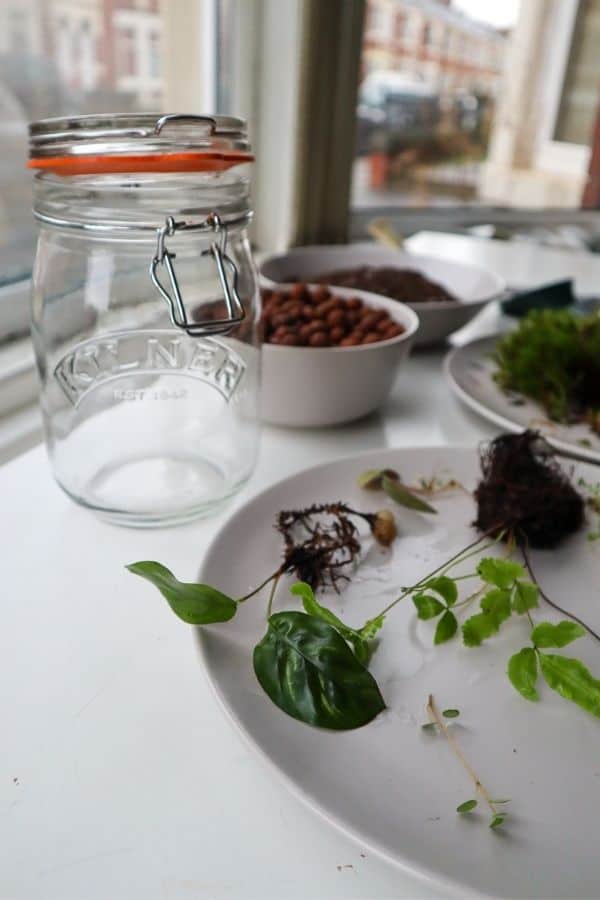
Got a jar that’s not a mason jar? No worries.
Pretty much any old glass jar with a lid will do! Mason jars just happen to be one of the more consistent choices, but pickle jars, jam jars, candy jars – they’re all good. Especially if you’re making a mini terrarium.
Substrate / Soil
We’re going to be using tropical plants, so you’ll want an appropriate tropical substrate blend.
Something with great water retention and solid drainage. Meaning a substrate that will stay light and fluffy when damp, rather than forming a thick mud cake (like potting soil definitely does).
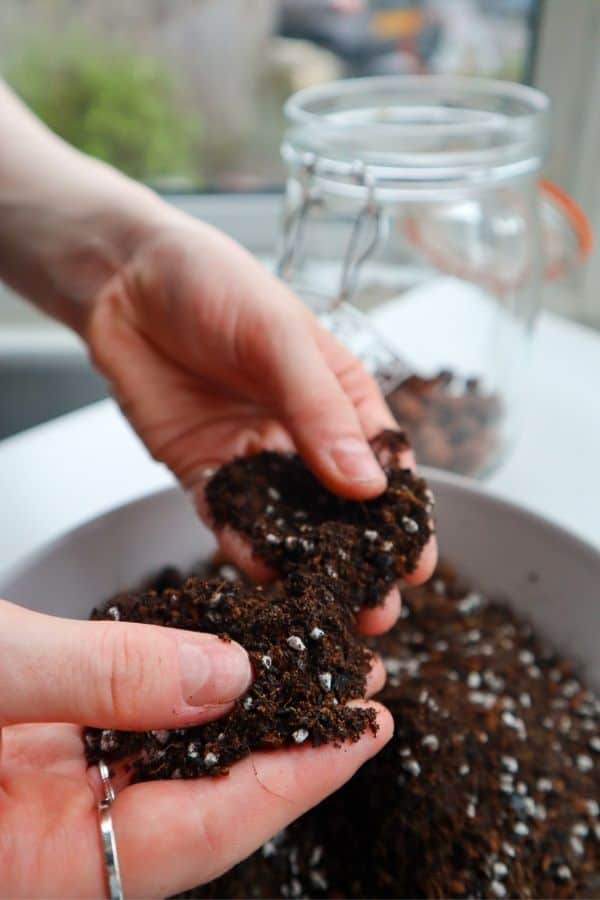
If you’re unsure, you can’t go wrong with any variation of the classic ABG mix. It’s all about getting the right balance of chunkiness and fluffiness through your chosen ingredients.
Alternatively, for a versatile option right out of the bag, check out our signature terrarium substrate mix on our store.
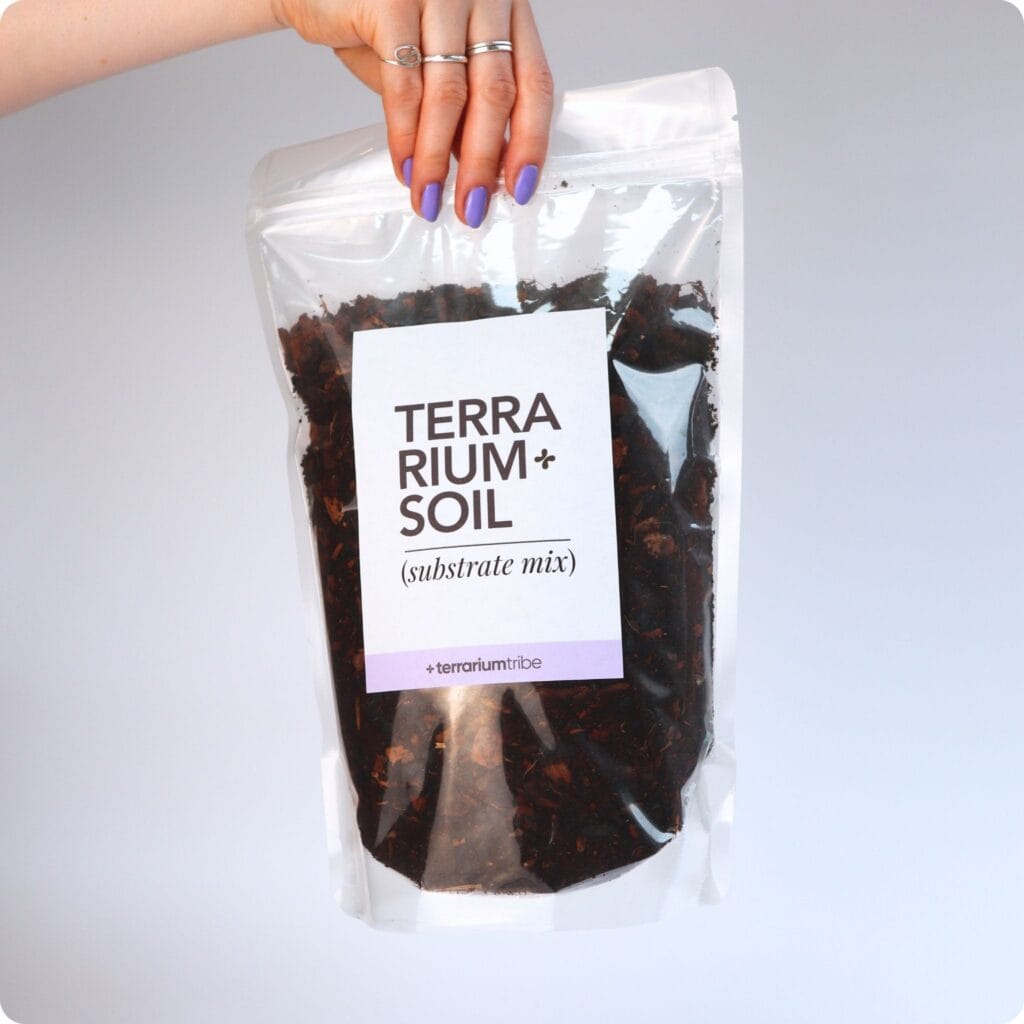
Terrarium Substrate Mix (Premium Blend)
A carefully crafted blend that balances all of your plants’ needs and sets you up for long-lasting success.
Beginner-friendly • Ready to use
Drainage Materials
A drainage layer can be used to capture any excess water that may pool in the bottom of the container.
It’s not strictly necessary, but it can be a helpful fail-safe for accidental overwatering (or it can just be a lovely decorative addition).
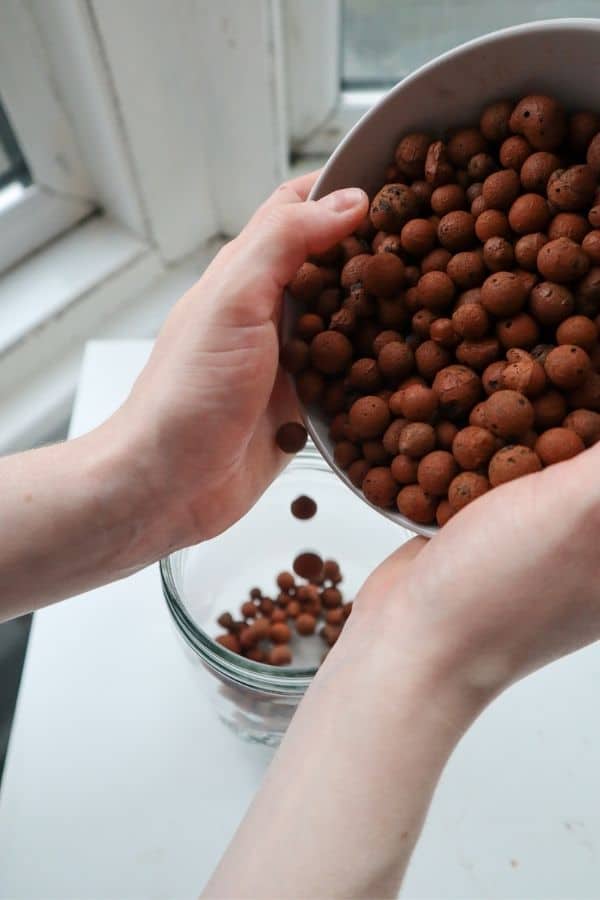
We’re using leca balls in our build.
They’re lightweight and super effective at absorbing water, and the plants can even access that stored water later should they need it. Failing that, any small rocks would still work to create a little reservoir.
Tools
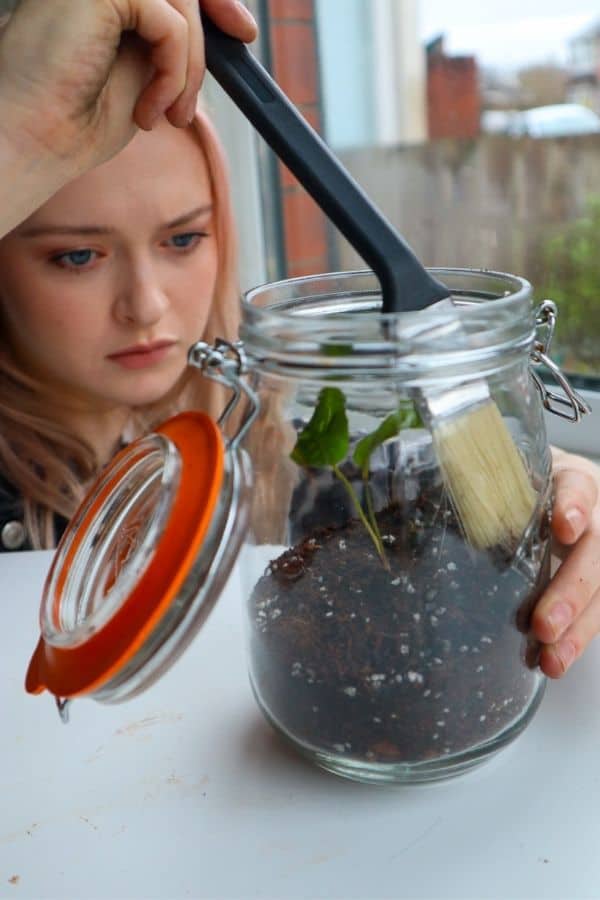
We’re operating in tight spaces here, so it can be very helpful to have a few terrarium tools to hand.
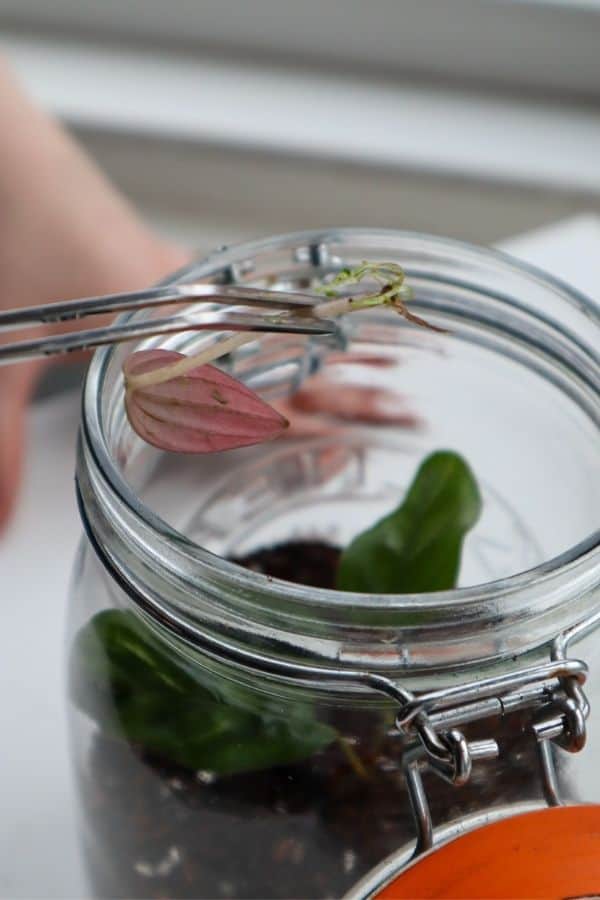
Tweezers are your new best friend here (though chopsticks can work too).
Planting delicate plants and maneuvering moss threads can be challenging at the best of times and sometimes nigh on impossible in a fully planted mason jar.
Long scissors and a long-handled brush can help a lot, too, but you can probably manage without them.
Or, if you have small hands like my glamorous assistant Rae – you might not need any tools!
Choosing Jar Terrarium Plants
As a small closed terrarium, you’ll be needing small tropical plants.
Ideally, those that start small and stay small, but there’s nothing wrong with swapping a larger plant out later (we’ll probably have to do that with one of ours).
Foliage
You’ll probably only have enough space for one or two foliage plants, so feel free to choose something really bright and eye-catching!
Good options could be Fittonia, Aluminium Plants, and Bloodleaf plants. Tiny ferns like the Fluffy Ruffles Fern or mini Bolbitis fern can work well, too.
We’re actually breaking our own rules and using a baby Peacock Calathea, but it’s so pretty… and thankfully also a slow grower.
Moss
Next, you’ll need some lush moss to set the scene.
I’d wholeheartedly recommend Cushion Moss (Leucobryum glaucum) or Mood Moss (Dicranum scoparium).
They’re both full of color and texture, and they hold up very well in closed terrariums of all kinds.
You won’t need huge quantities for a mason jar terrarium, but it’s worth getting a little more than you think you’ll need. Moss is fragile after all, and if you trim them down a lot – as we will be – they can fall apart quite easily.
Epiphytes
Last but not least, epiphytes are the icing on the cake.
Being soilless plants that can grow on top of other plants, these can be laid directly over your moss as a highlight to your foliage plants.
Small epiphytic vines like the String of Turtles (Peperomia prostrata) or Pilea glauca are my top picks. You really can just sprinkle some cuttings into a terrarium and watch them root up! Ficus pumila works well too, but a bit too well…
Or, pretty much any Selaginella is going to thrive this way.
How to Make a Closed Jar Terrarium – Key Steps
1 | Prepare Your Materials
Just like baking a cake, it’s a good idea to have all your materials washed and ready at hand.
That goes for your plants and your container, too.
Give your container a good clean with soapy water. We don’t want any jam or pickle residue in there! (Ideally, with purified water, as tap water can leave white marks on the glass over time).
For the plants, I prefer to give them a rinse – especially if they have any old soil attached that needs removing – but if you’re confident they’re healthy (and already in a suitable substrate), you can likely plant them up as they are.
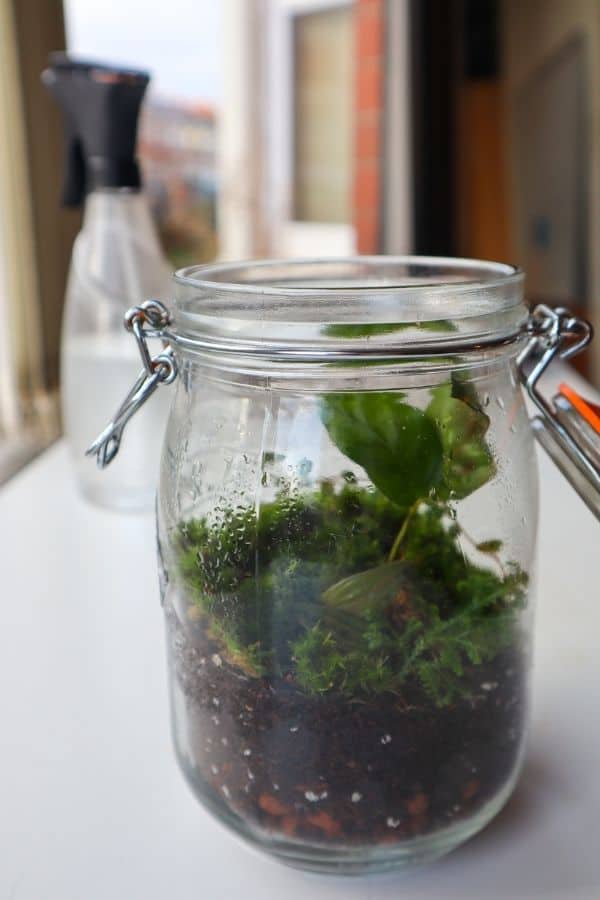
2 | Lay out Your Drainage Layer
If you’ve opted for a drainage layer, now is the time to add it.
You’ll need to fill the base of your container with enough of your drainage material to create some space for the water to drain into.
With leca being quite large, just a couple of balls high is usually enough. Whereas you might need a thicker layer of pebbles to achieve the same level of space (depending on their size).
For my 1L container, the layer ends up being about an inch thick.
3 | Add Your Substrate
The biggest of the terrarium layers.
You’ll want to add enough substrate to fully accommodate the root ball of your biggest plant, which will probably be your feature foliage plant.
But remember, you can always slope the substrate to create a deeper and a shallower end (my range here is 1-2 inches deep).
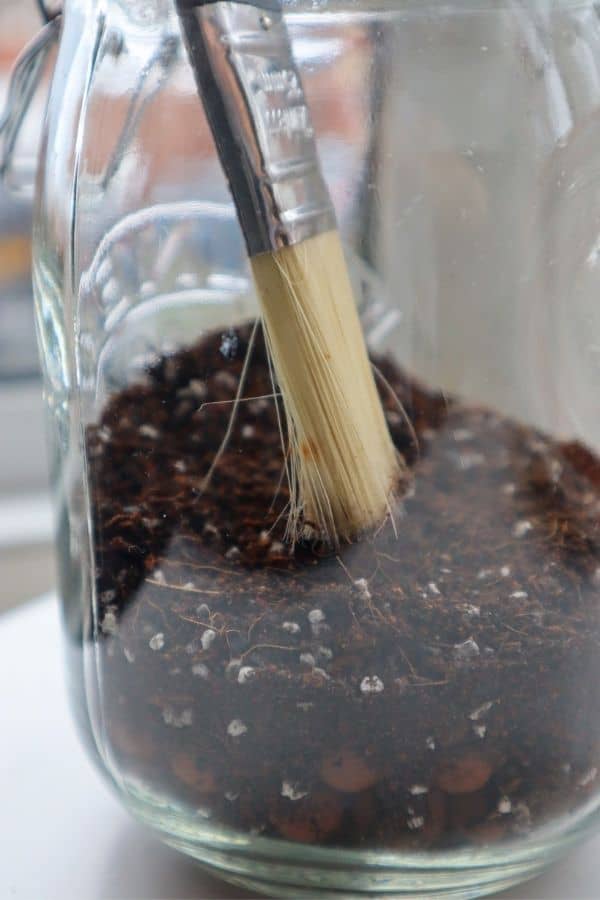
That’s great for creating a sense of natural scale and helps you plant those bigger plants without filling your jar full of soil.
More space = more plants!
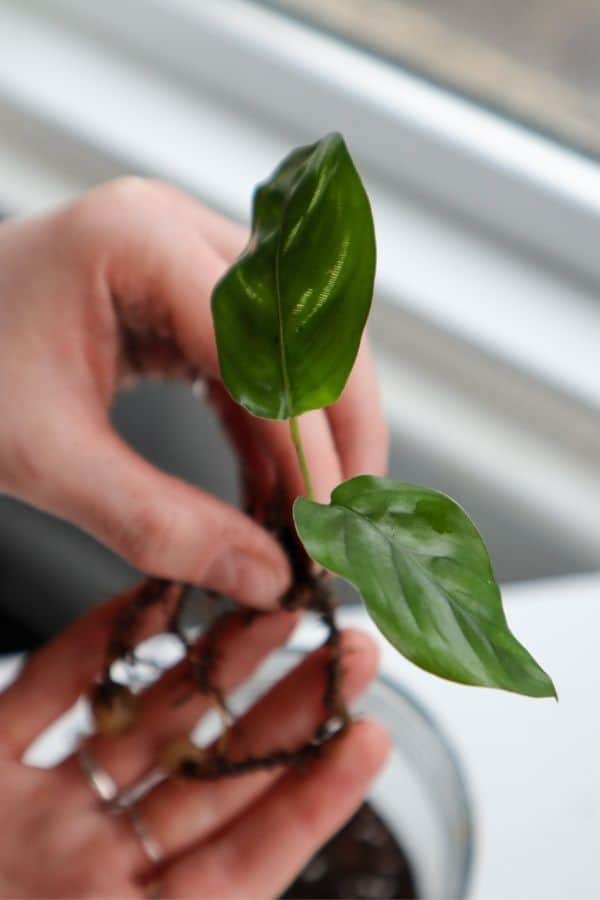
4 | Plant Your Feature Plant(s)
As the focal point of the terrarium, it’s time to plant your largest plant in the prime position.
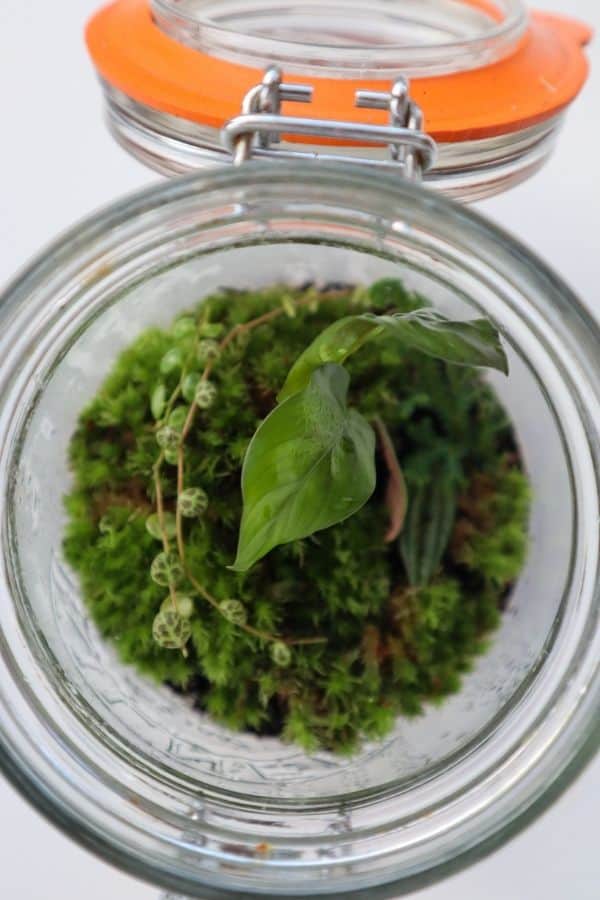
We’ve planted our Calathea in the middle to give it plenty of space to grow. You’ll want to avoid any leaves coming into direct contact with the condensation on the inside of the glass.
Then, we’ve added a couple of Peperomia Rosso rooted cuttings to accentuate the feature.
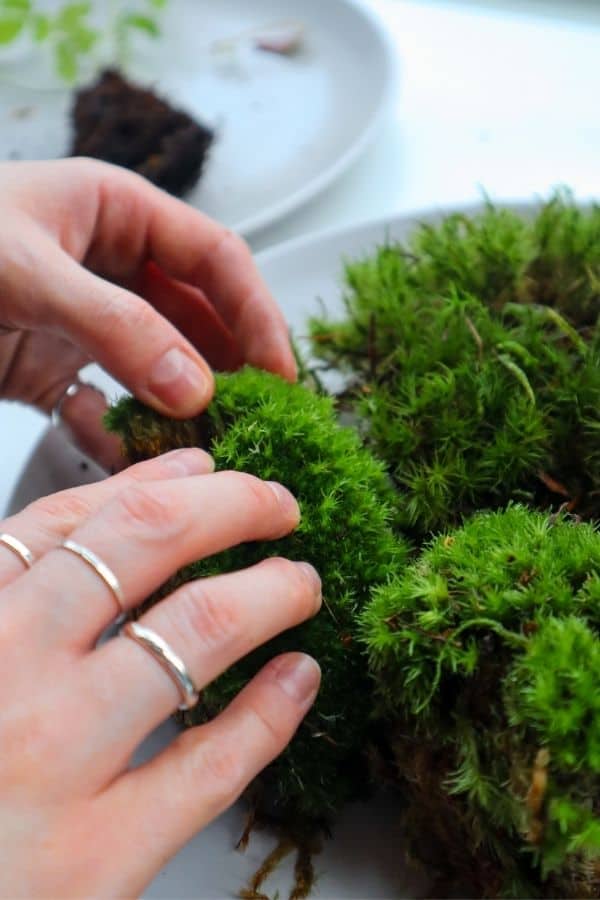
5 | Prepare & Add Your Moss
Now that we have all the essential things planted, it’s time to start covering the substrate with moss.
I generally prefer to cover the space completely, but it’s down to personal preference. It’s trickier to pull off, but it makes it look more natural.

You can trim as much of the brown fibrous elements from underneath the moss.
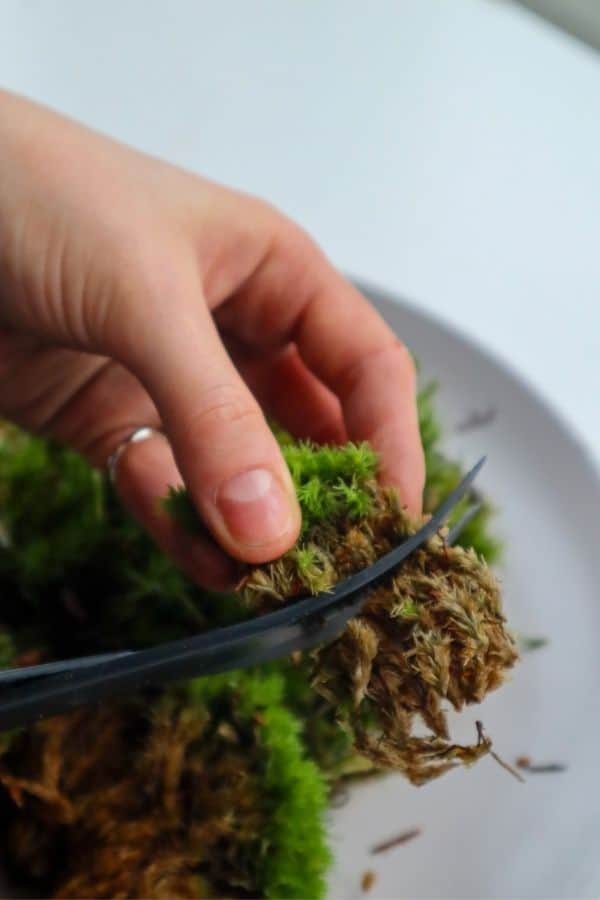
If you choose to bring the moss right up to the edge of the glass, try to angle the moss down towards the glass. That way, you’ll be able to hide any remaining fibrous tufts underneath (if you’re careful).
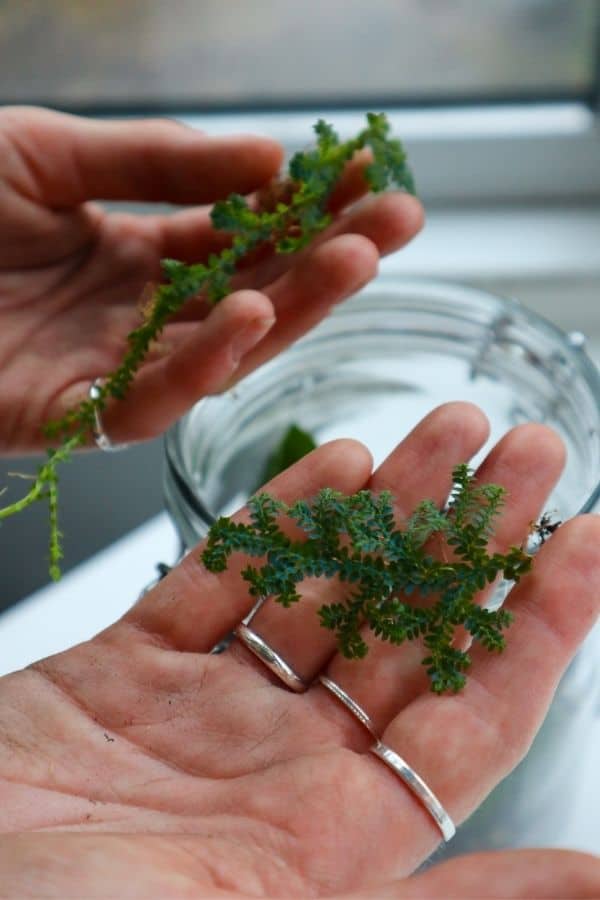
6 | Sprinkle in Your Epiphytes
Last but not least, here come your plant highlights!
We’re using a few cuttings of our String of Turtles plant and the Peacock Selaginella. Simply lay these on top of your moss in any way you see fit.
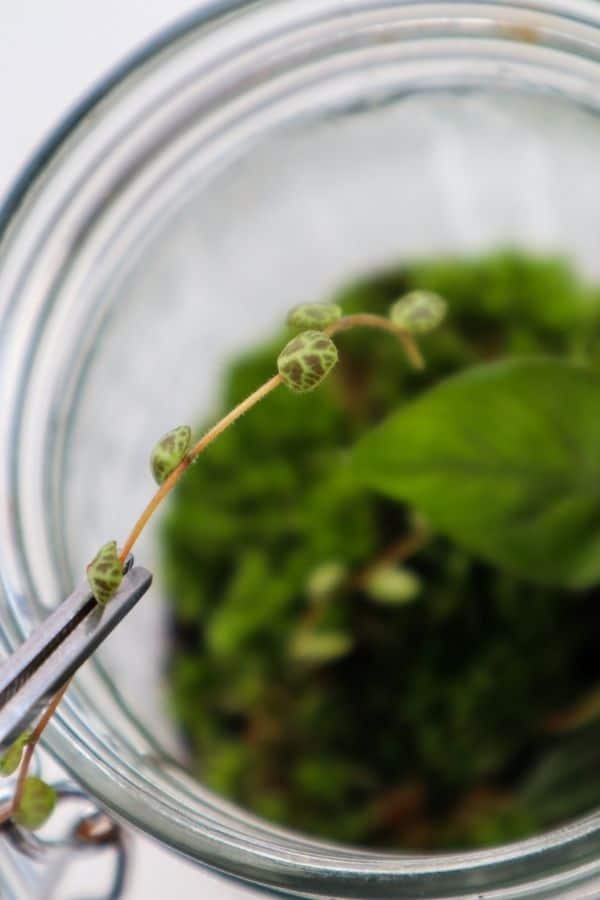
They’ll root up readily in a high-humidity environment. You can generally snip them up as much as you need to; you don’t need longer sections of stems, as I have.
Then, you’re done! It’s time to marvel at your new creation.
And once you’ve made one jar terrarium, it’s very easy to start mentally converting every glass container in the house into “the next one.” For more directions to take that obsession, see our guide to terrarium ideas that actually work.
Mason Jar Terrarium Care
Alright, how do we look after our new favorite jar of green wonderfulness?
To start, it needs to go in a bright spot out of direct sunlight (they can quickly burn and overheat in strong sunlight). North-facing windows are an excellent choice to get lots of gentle light, or you can always just put it a few feet away from the stronger light sources.
When it comes to watering, you’ll want to keep the substrate lightly moist but never saturated.
A spray bottle is the best way to do this. A light misting is all it needs, as even one big glug from a bottle could disturb the whole system.
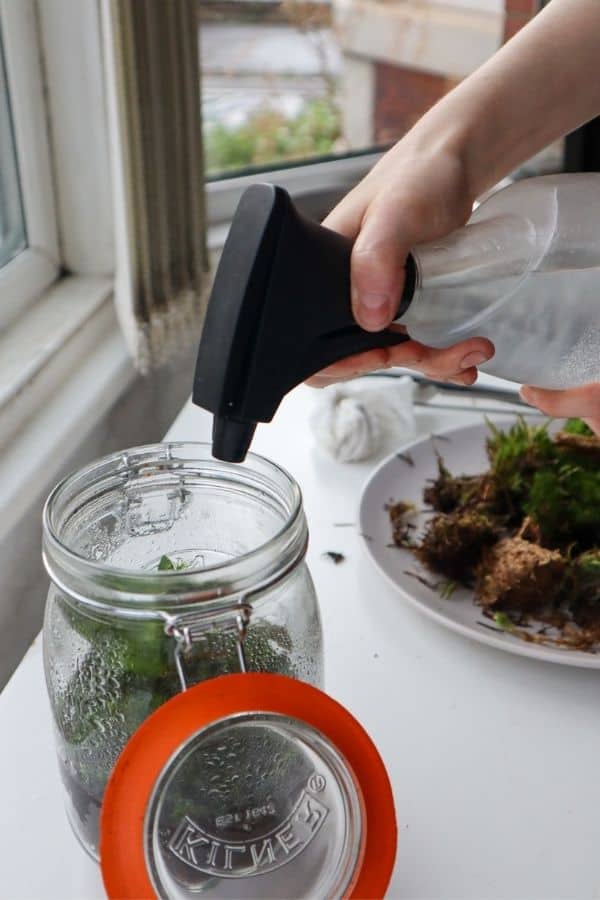
Once it’s looking dry and has no condensation on the sides of the glass, you’ll need to top it up with a few more sprays.
That’s about it, really!
Really nicely written guide. Thank you.
Beautifully done and really appreciated. My daughter gave me a mason jar terrarium a few years ago and I want to clean it out and start again. The plants in it died and I will try your suggestions. I’m excited about it. I separated the rocks, bark and soil. Separating was really not tedious but therapeutic. All of it is sentimental. I will add some new soil.