Making a terrarium is easy to overcomplicate.
Drainage first, then substrate. Then the right plants, moss, water, and light. Each aspect solves a specific problem, which is why skipping any usually creates one.
That’s the whole build, really. Not complicated, but it’s still easy to go wrong.
So this guide keeps the process practical.
I’ll show you how to make a terrarium from the ground up, one layer at a time, with a proper planted glass setup that’s green, humid, enclosed, and built to last.
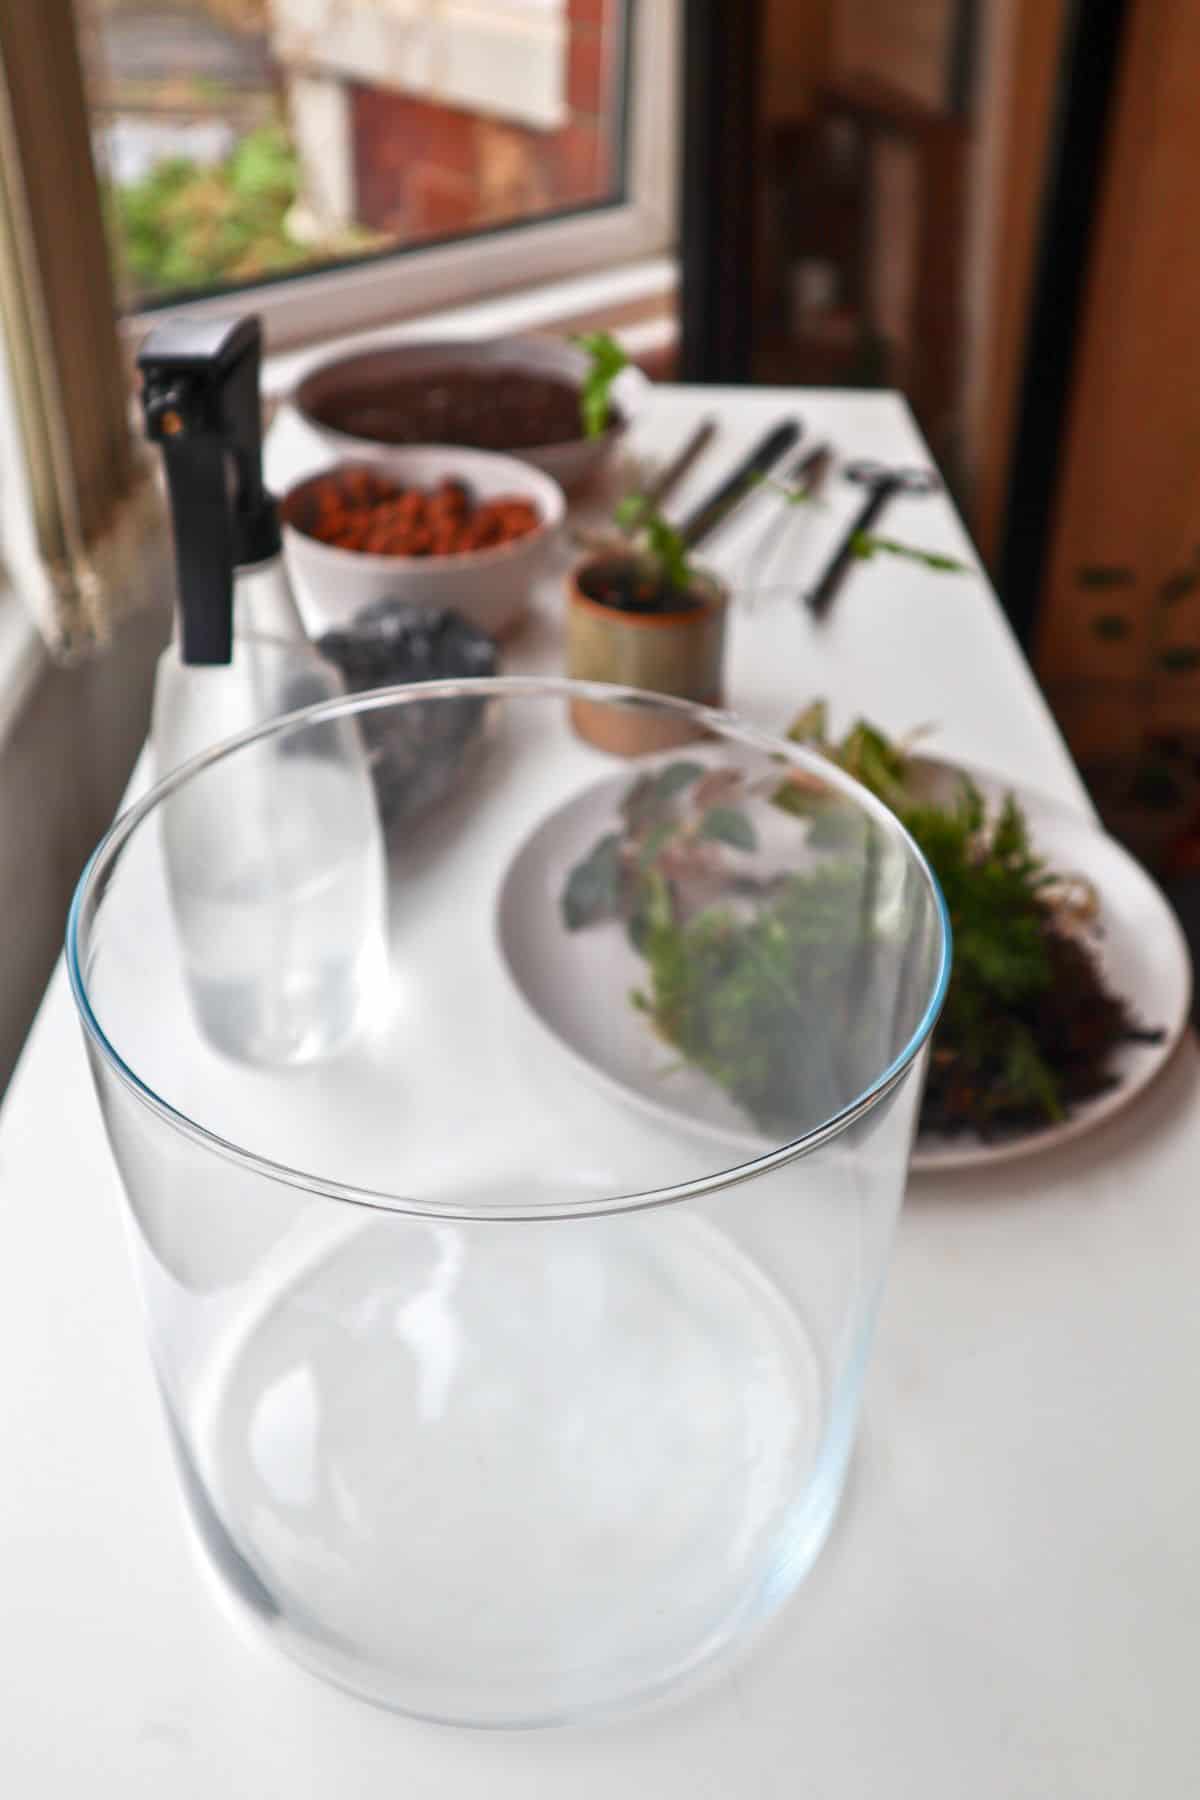
What You Need to Make a Terrarium
You don’t need a huge list of specialist materials, but you do need the right basics.
For this build, you’ll need:
- A clear glass container.
- A lid or temporary cover (e.g., Saran Wrap).
- Drainage material such as LECA, lava rock, gravel, or small stones.
- Optional mesh and activated charcoal.
- A moisture-retentive terrarium substrate.
- Small tropical plants.
- Moss.
- One piece of rock or wood for structure.
- A spray bottle.
- A spoon, brush, or planting tool.
That’s the functional list. Decorative bits are optional. The actual success of the terrarium comes down to structure, plant choice, moisture, and light.
How to Make a Terrarium Step-by-Step
Once you’ve got your materials together, the build itself is pretty straightforward: container, drainage, substrate, structure, plants, moss, water, and seal.
Let’s go step-by-step.
1. Choose a Glass Container
Almost any clear glass container can become a terrarium.
The shape matters, though. A lot.
Wider openings are much easier to plant up. If you can get your hand inside, you’re already making life easier for yourself.
Goldfish bowls, vases, aquariums, large mason jars, storage jars, and open glass cylinders can all work well. It doesn’t need to be expensive either. Thrift stores and department stores are often full of perfectly usable glassware pretending to be home decor.
A lid is ideal, but it isn’t essential straight away.
Many glass containers don’t come with one, and you can always use a temporary cover while the terrarium settles. Cling film/Saran Wrap works perfectly well as a short-term terrarium lid solution.
2. Add a Drainage Layer
Terrarium containers don’t have drainage holes, so the first layer needs to give excess water somewhere to go.
This bottom layer is often called a drainage layer or false bottom. It acts as a buffer between the wettest part of the container and the plant roots.
To make it, add roughly an inch of drainage material to the bottom of your container.
Gravel is a common and inexpensive option, but I prefer lighter, more porous materials where possible. LECA and lava rock are easier to work with, add less weight in larger builds, and hold moisture without turning the base into a compacted puddle.
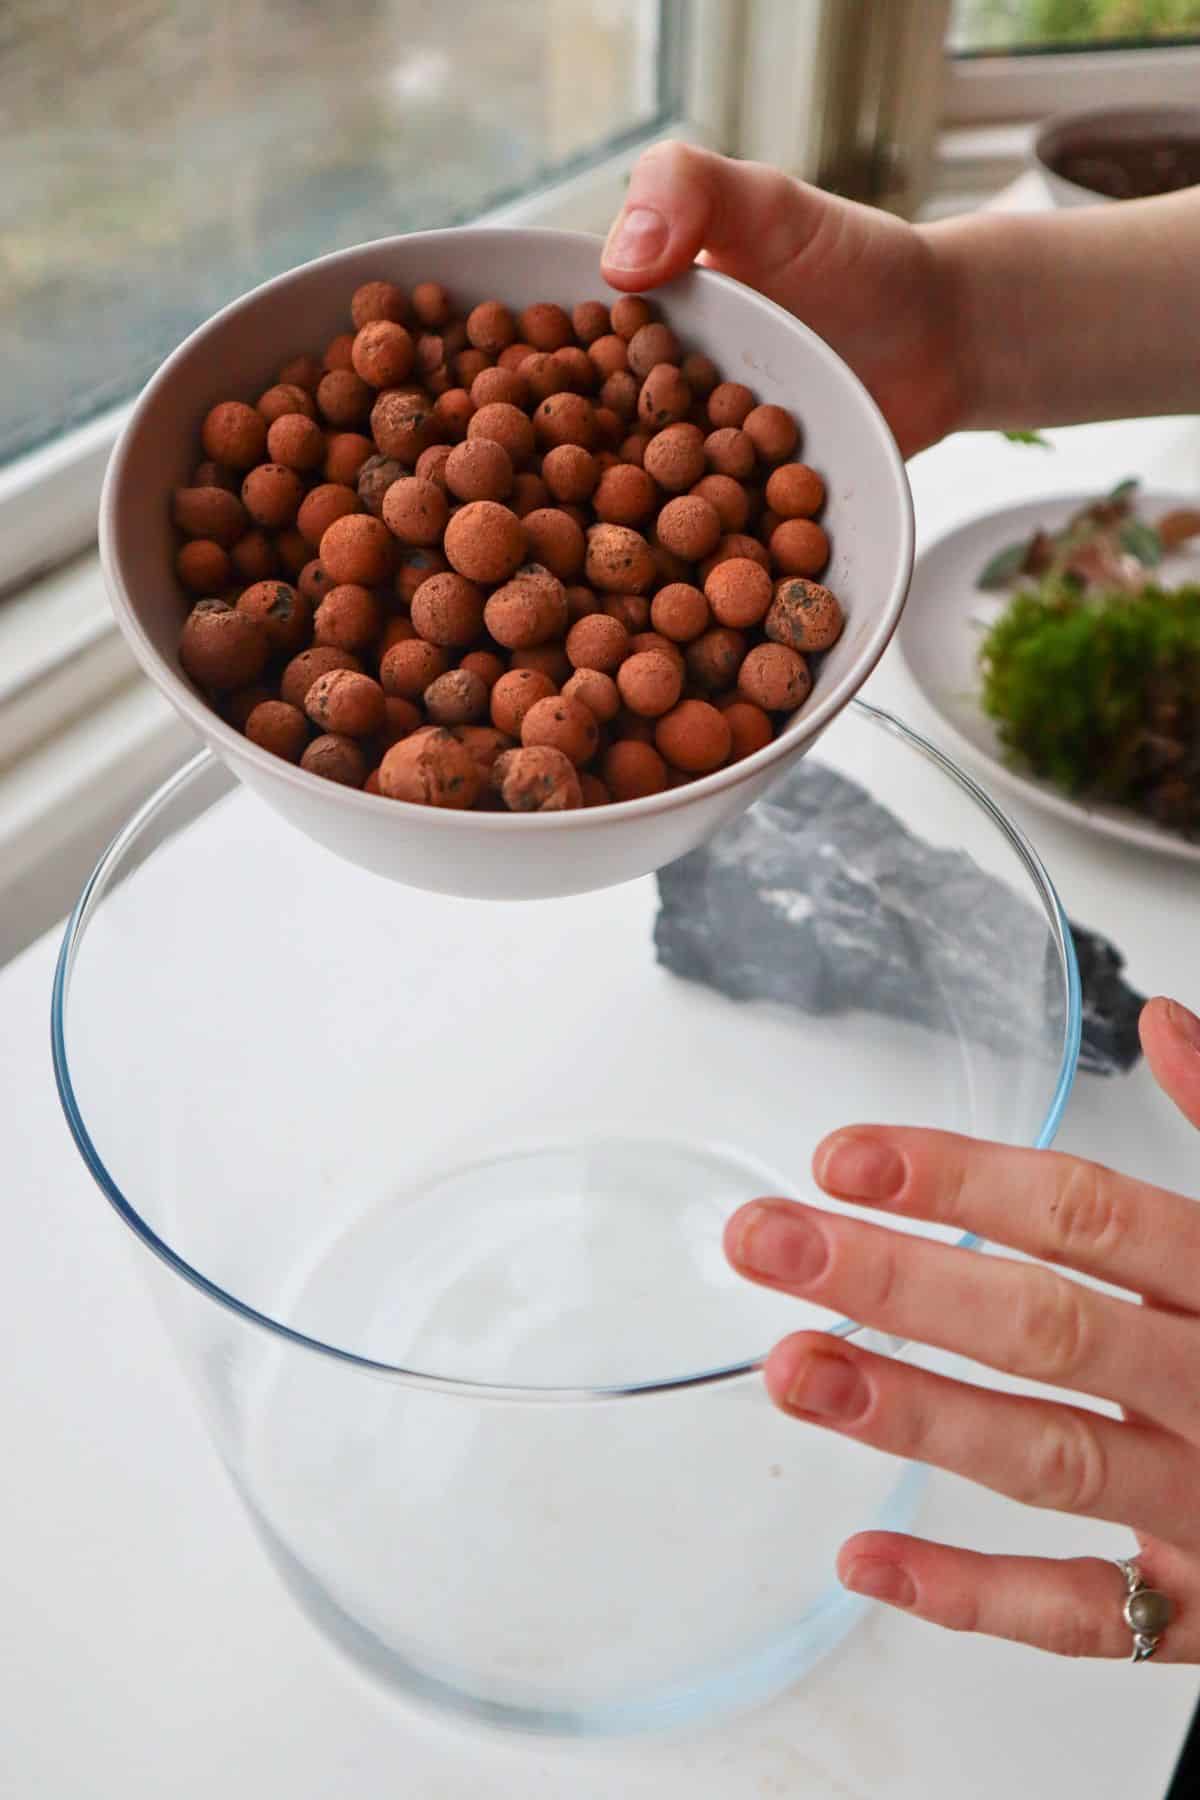
The drainage layer won’t magically fix overwatering, but it does give you a margin for error. That really does help, because most terrarium failures start with too much water and nowhere for it to go.
You can also add mesh and activated charcoal as part of this lower section.
3. Add Mesh and Charcoal
This step is optional, but useful.
A mesh screen sits between the drainage layer and the substrate. Its job is simple – it keeps soil from falling down into the drainage layer and blocking up the space.
You don’t need anything fancy. A piece of terrarium mesh, plastic mesh, or fine screen cut to shape will do the job.

Activated charcoal is another optional layer. It’s often used in terrariums to help with filtration and freshness inside the closed environment.
You can add a thin layer of charcoal above the drainage material (often on top of the mesh), or mix some into the substrate itself.
If you’re keeping the build simple, don’t worry too much about this step. A good substrate, sensible watering, and healthy plants matter more than a perfect charcoal layer.
But if you already have mesh and charcoal available, they’re worth adding.
4. Add Terrarium Substrate
Next comes the all-important substrate layer.
This is where your plants actually live, so it needs to do more than just hold them upright.
A good terrarium substrate needs to hold moisture without becoming swampy, drain well enough to keep roots oxygenated, provide some nutrients, and stay structurally open over time.

Regular potting soil is honestly a pretty bad option for a closed terrarium. Many potting mixes are too dense, too rich, or too good at staying wet once sealed behind glass.
That’s why a purpose-made terrarium substrate is the best choice. Tropical, fern, or ABG-style mixes can all work well, as long as they’re moisture-retentive but not heavy and compacted.
Our signature terrarium substrate mix is designed for exactly this.
Add enough substrate to comfortably cover your plants’ roots. In most small to medium builds, that means around two to three inches of substrate, with more depth where larger plants will go.
You don’t need it perfectly flat. In fact, gentle slopes usually look more natural and give the layout more depth.
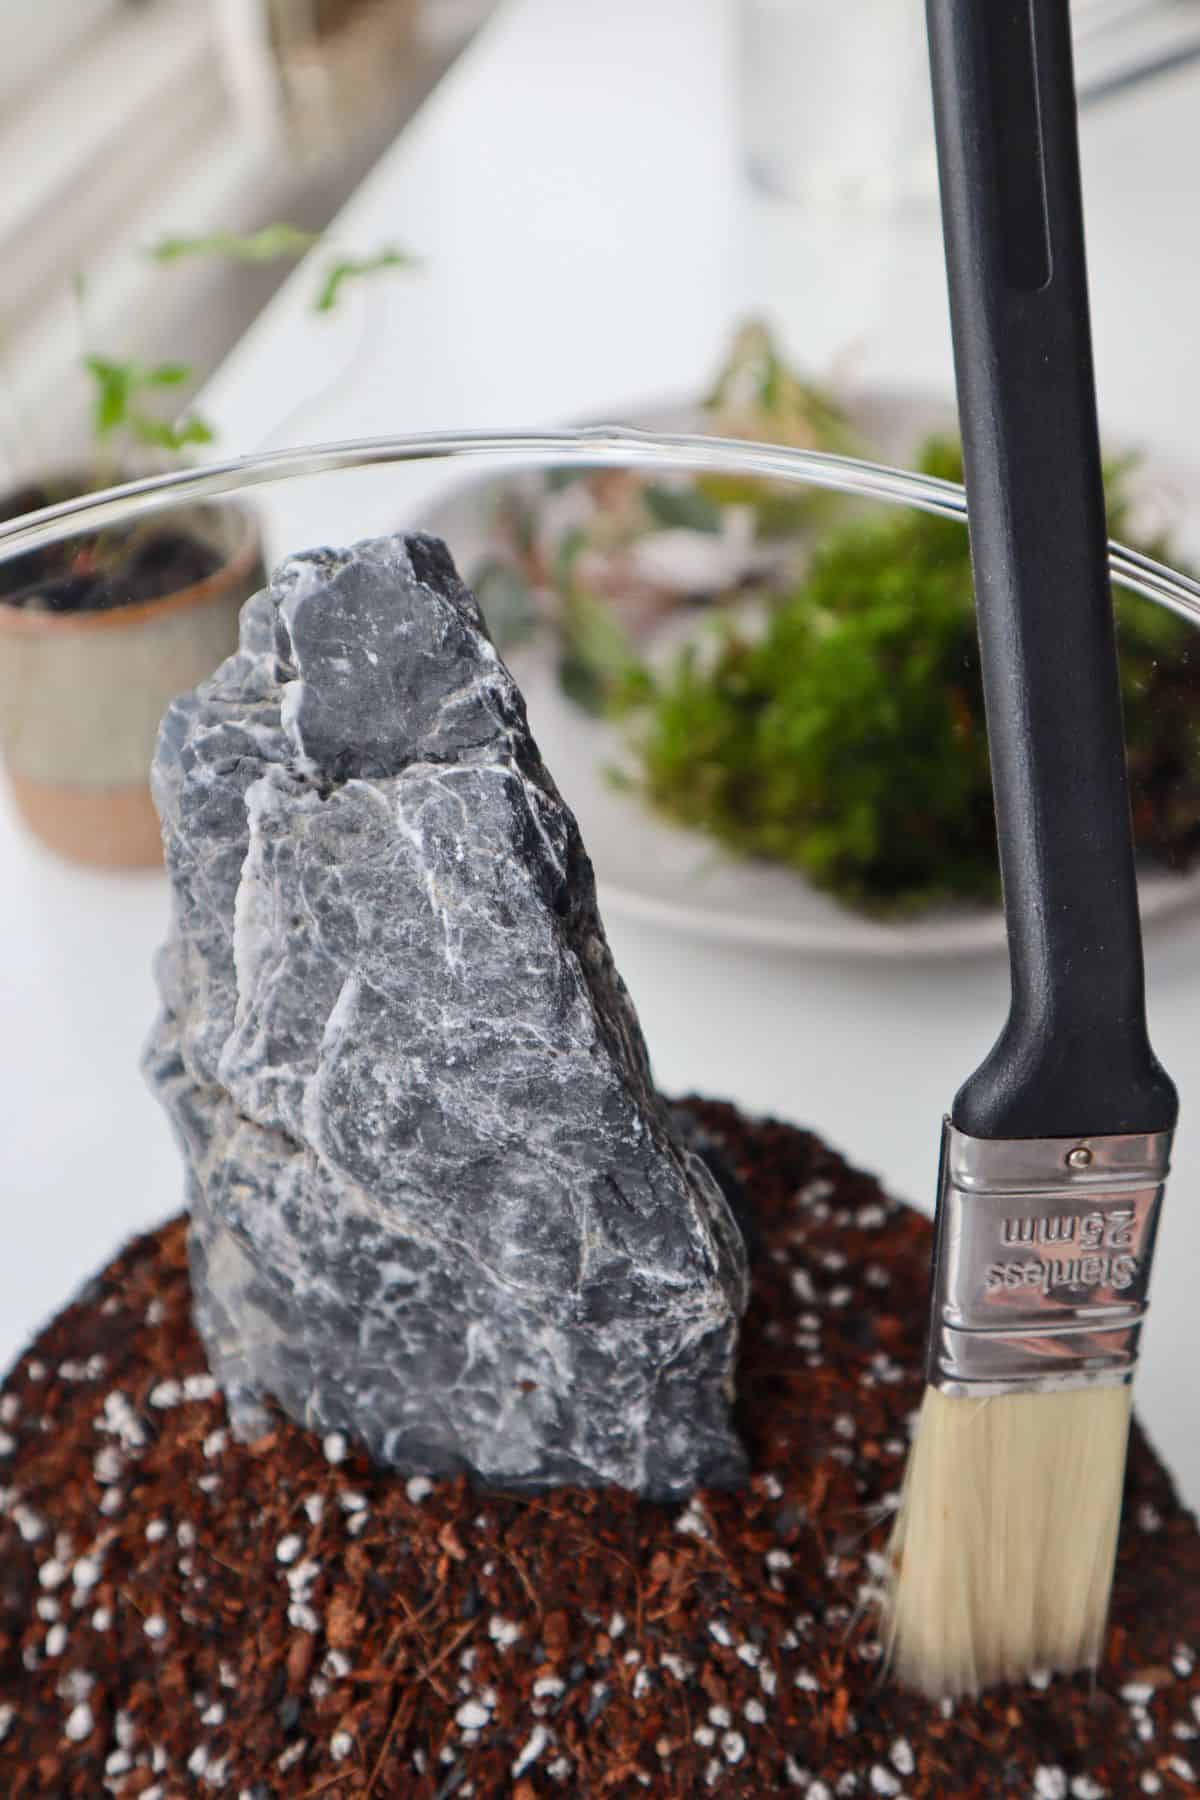
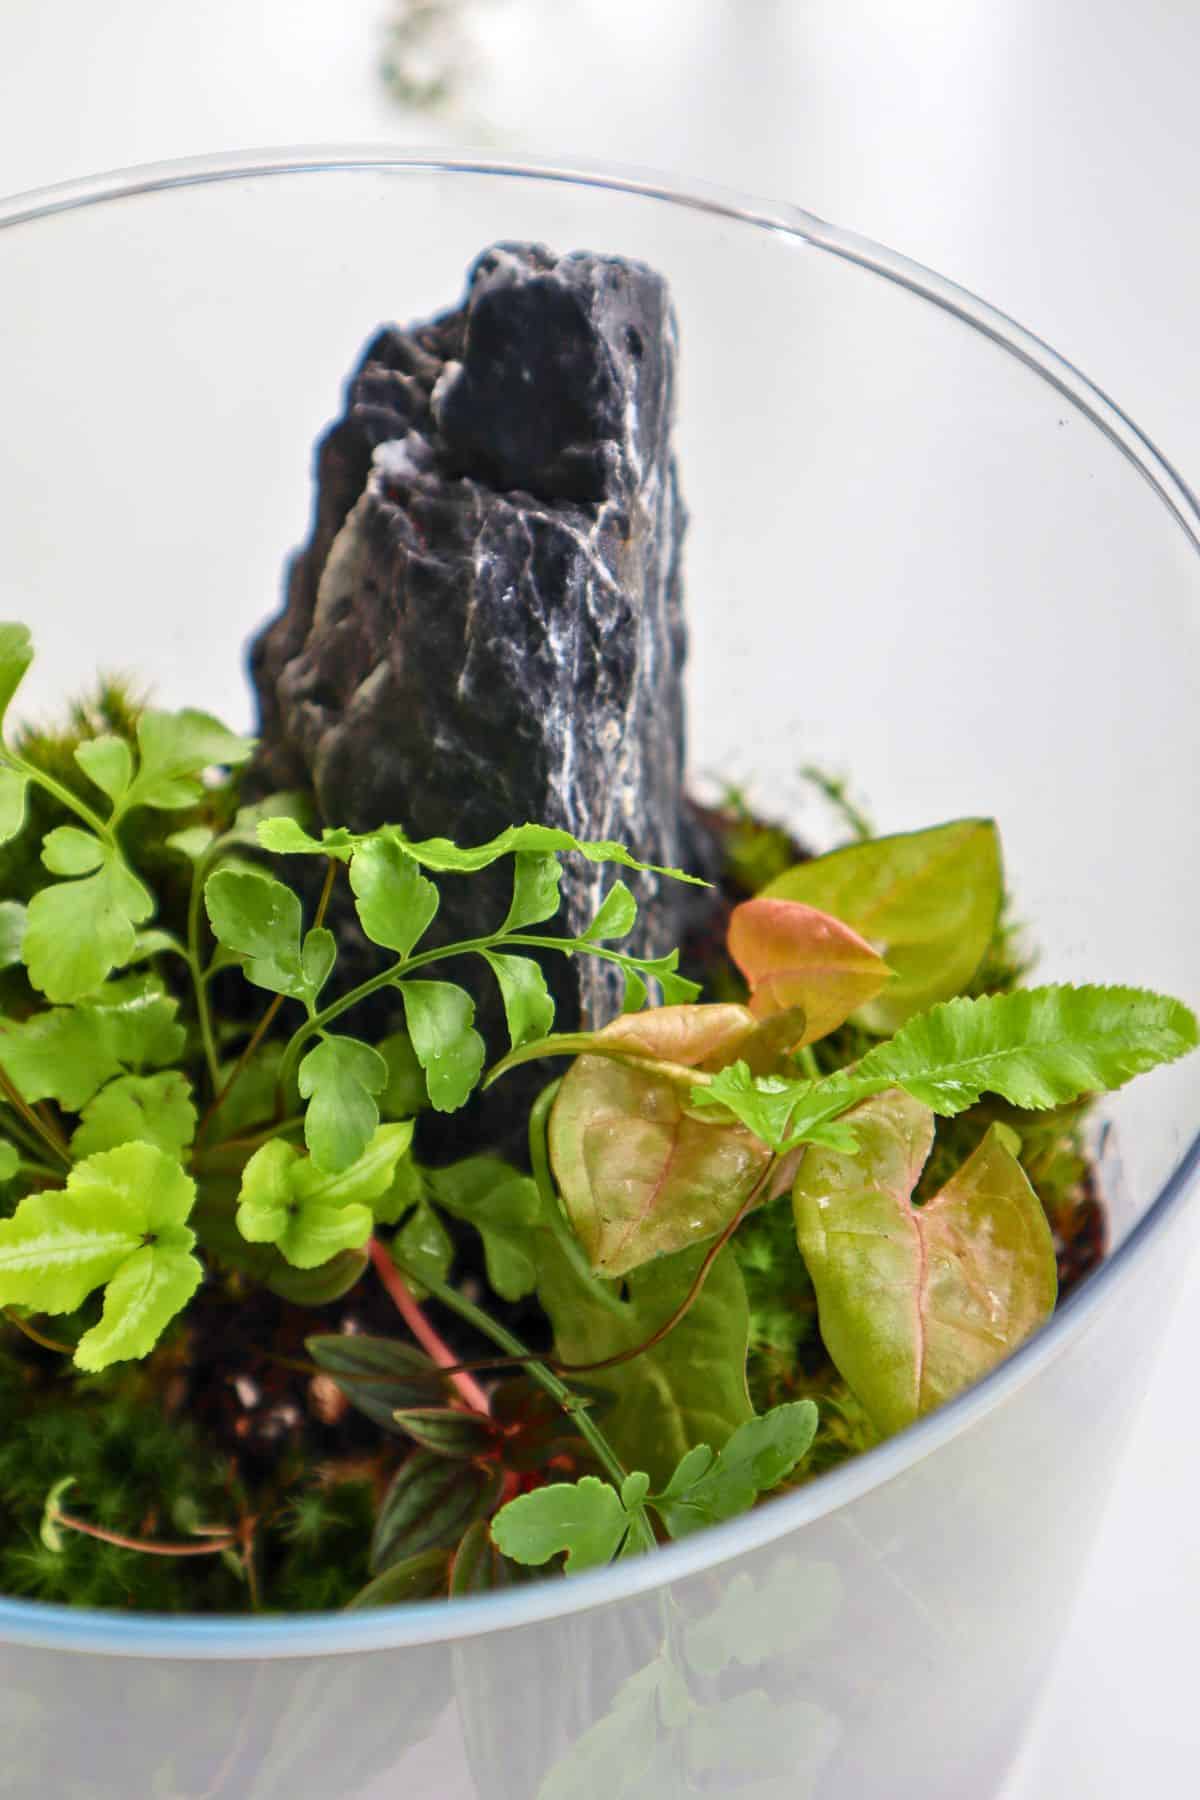
5. Place the Hardscape
Hardscape means the non-living structural pieces in your terrarium – usually rocks, wood, bark, or branches.
Technically, you can make a terrarium without hardscape.
But I wouldn’t.
A single good piece of stone or wood can quickly take your terrarium from zero to hero. It gives the plants something to grow around, fills the vertical space, adds contrast, and makes the whole scene look more natural.
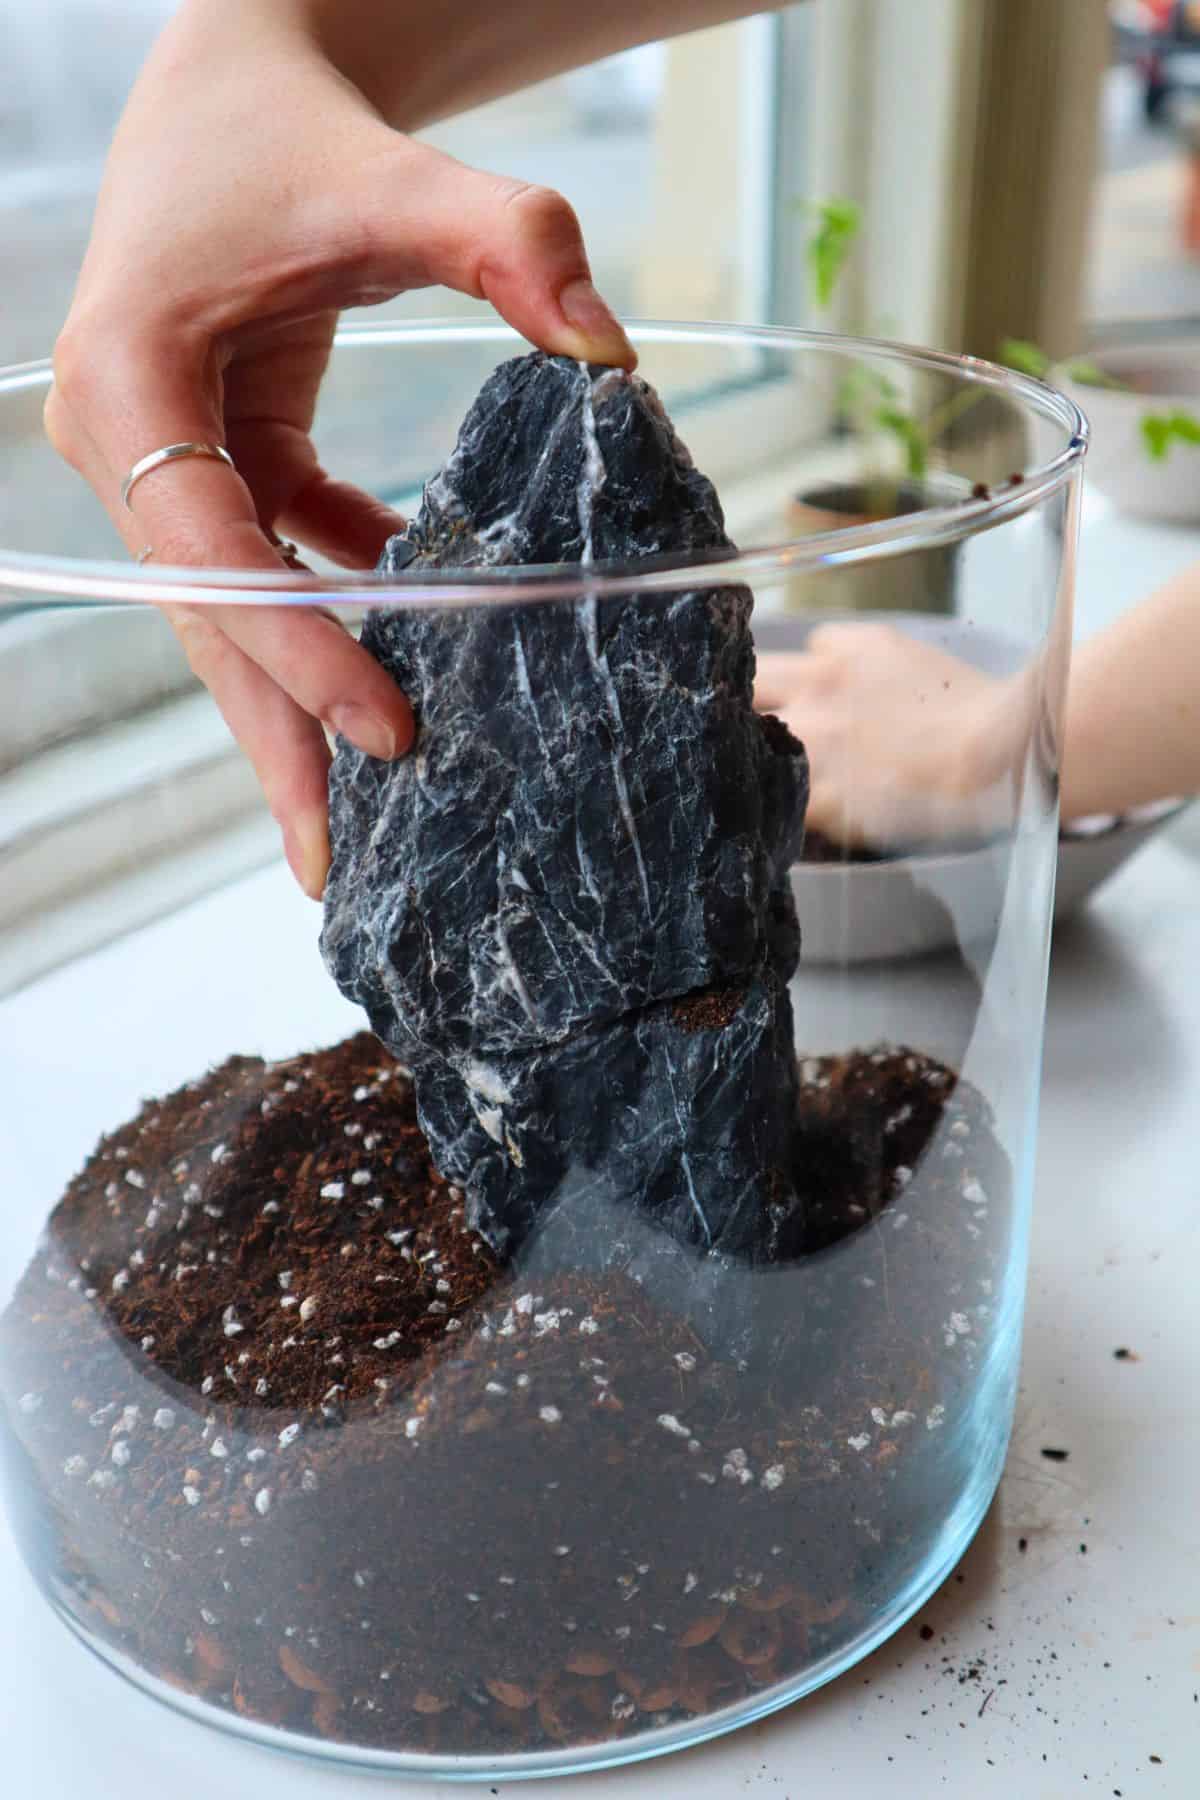
Seiryu stone, dragon stone, slate, lava rock, cork bark, driftwood, and spider wood can all work well. What matters most is that the piece fits the scale of the container and doesn’t overwhelm the planting space.
Place the hardscape before planting, so you can build the layout around it.
Partially burying the base is usually best. It makes the piece look more natural and helps keep it stable. You don’t want anything falling over and cracking the glass after everything is planted.
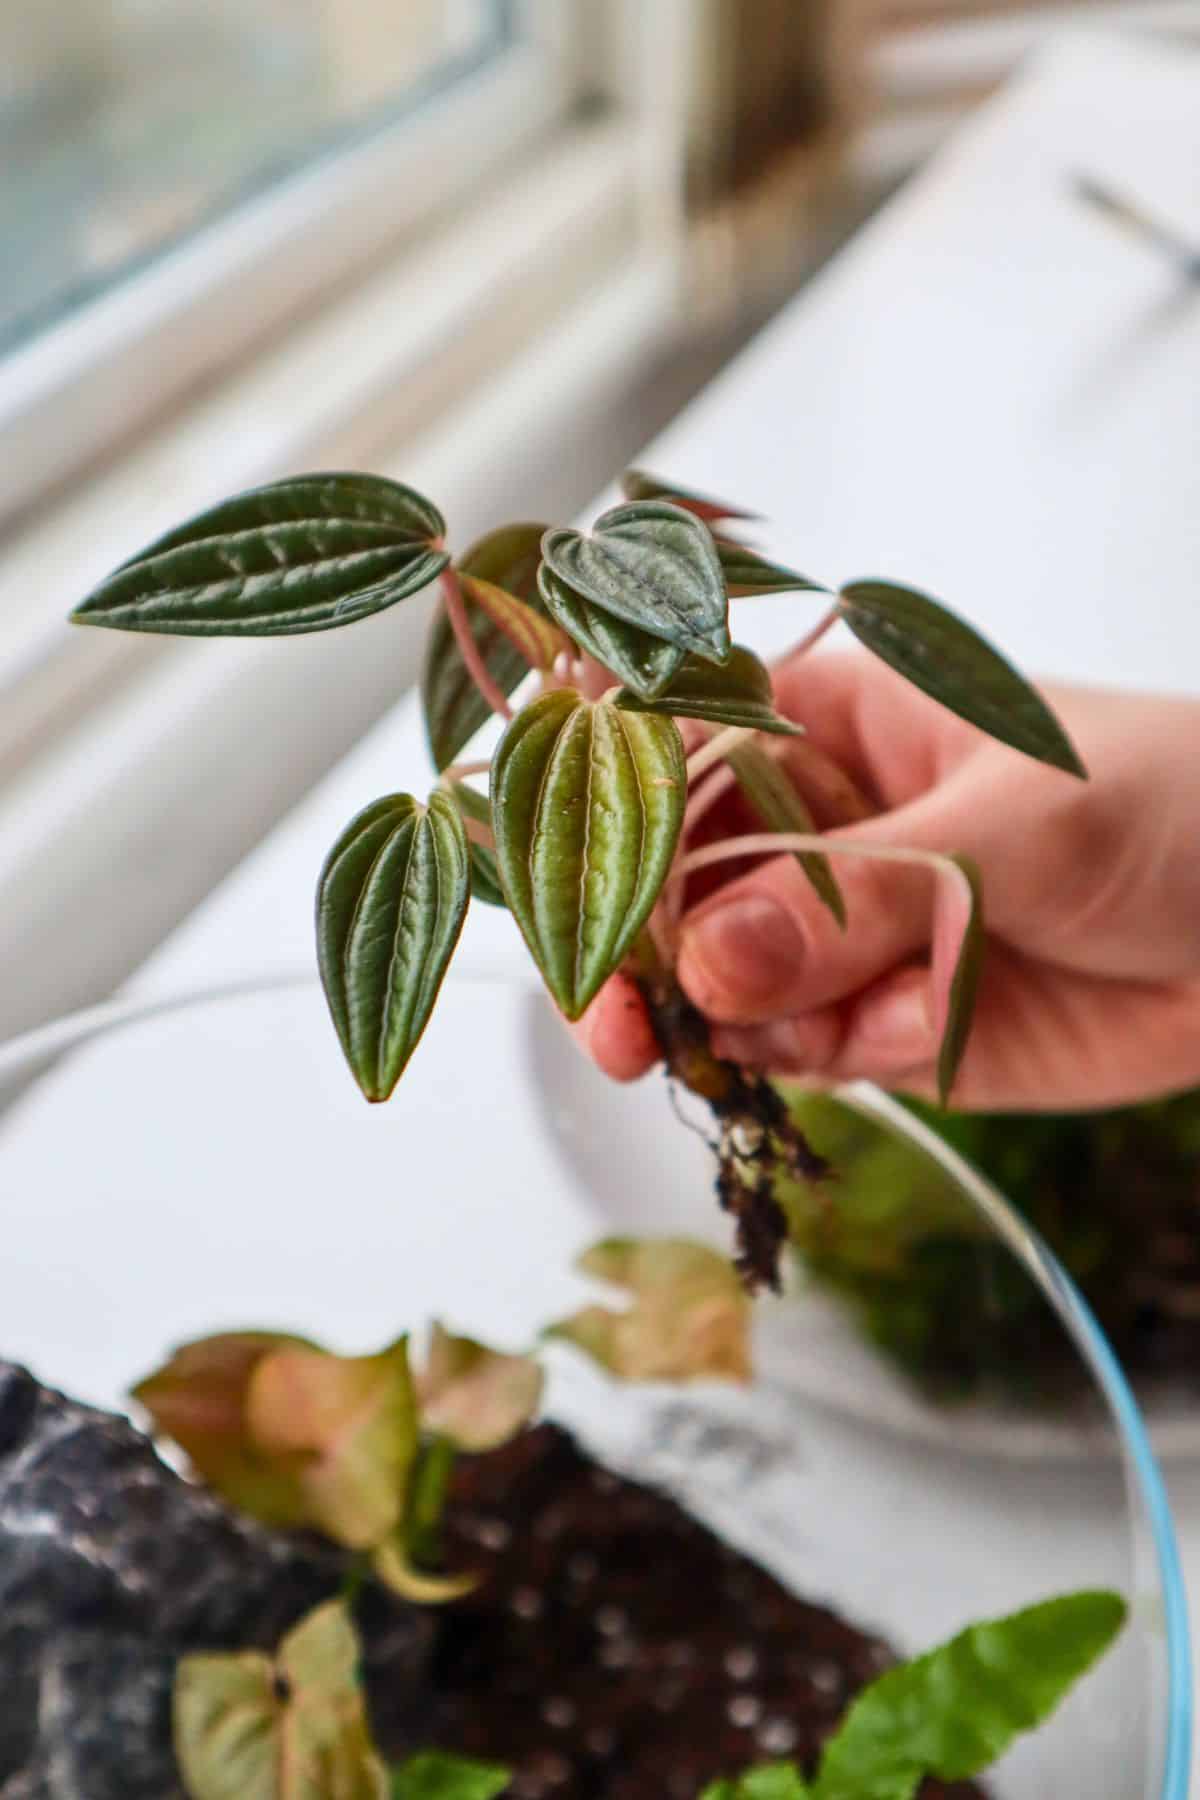
6. Add Your Terrarium Plants
Now you can plant up.
For a closed tropical terrarium, choose plants that enjoy warmth, humidity, and consistent moisture. That is the big plant rule here.
So yes, put the succulents and cacti down.
Fittonia, Polka Dot Plants, Pilea, Peperomia, miniature ferns, Selaginella, Ficus pumila, Pilea glauca, and small Syngonium varieties are all much better choices.
Start with the largest or tallest plant first. This helps set the scale of the layout and creates more natural levels.
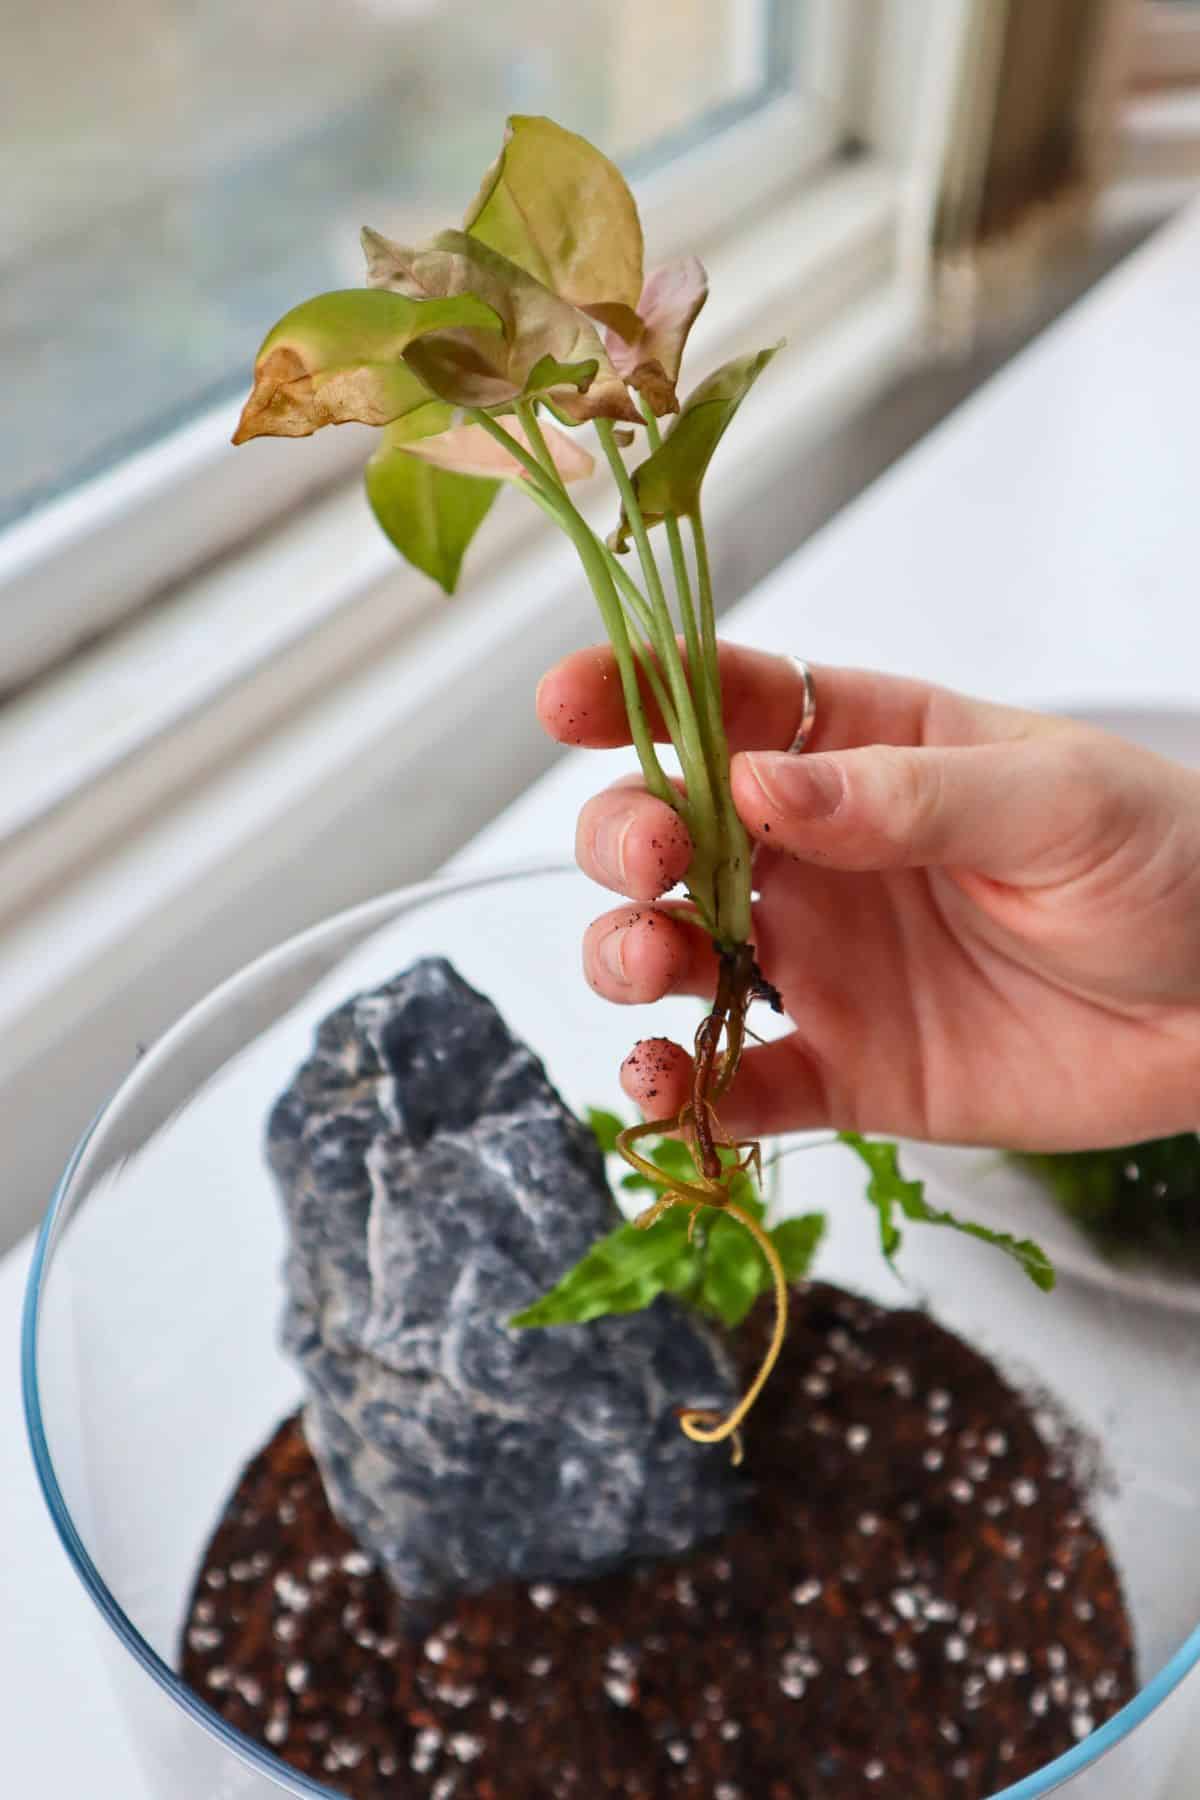
Then add smaller plants around it, working from background to foreground. Use a spoon, brush handle, or planting tool to make a hole in the substrate, place the roots in, and gently firm the substrate around them.
If the substrate is difficult to work with, mist it lightly first. Damp substrate is usually easier to shape. Just don’t soak it before you’ve even finished planting.
Try not to cram the container full on day one. Plants need room to settle and grow, and a packed terrarium can turn messy quickly.
Plant for where the terrarium will be in a few months, not just how full you want it to look today.
7. Add Moss
Moss is the cherry on top of the terrarium cake.
It softens hard edges, covers exposed substrate, and gives the terrarium that lush, established look almost instantly.
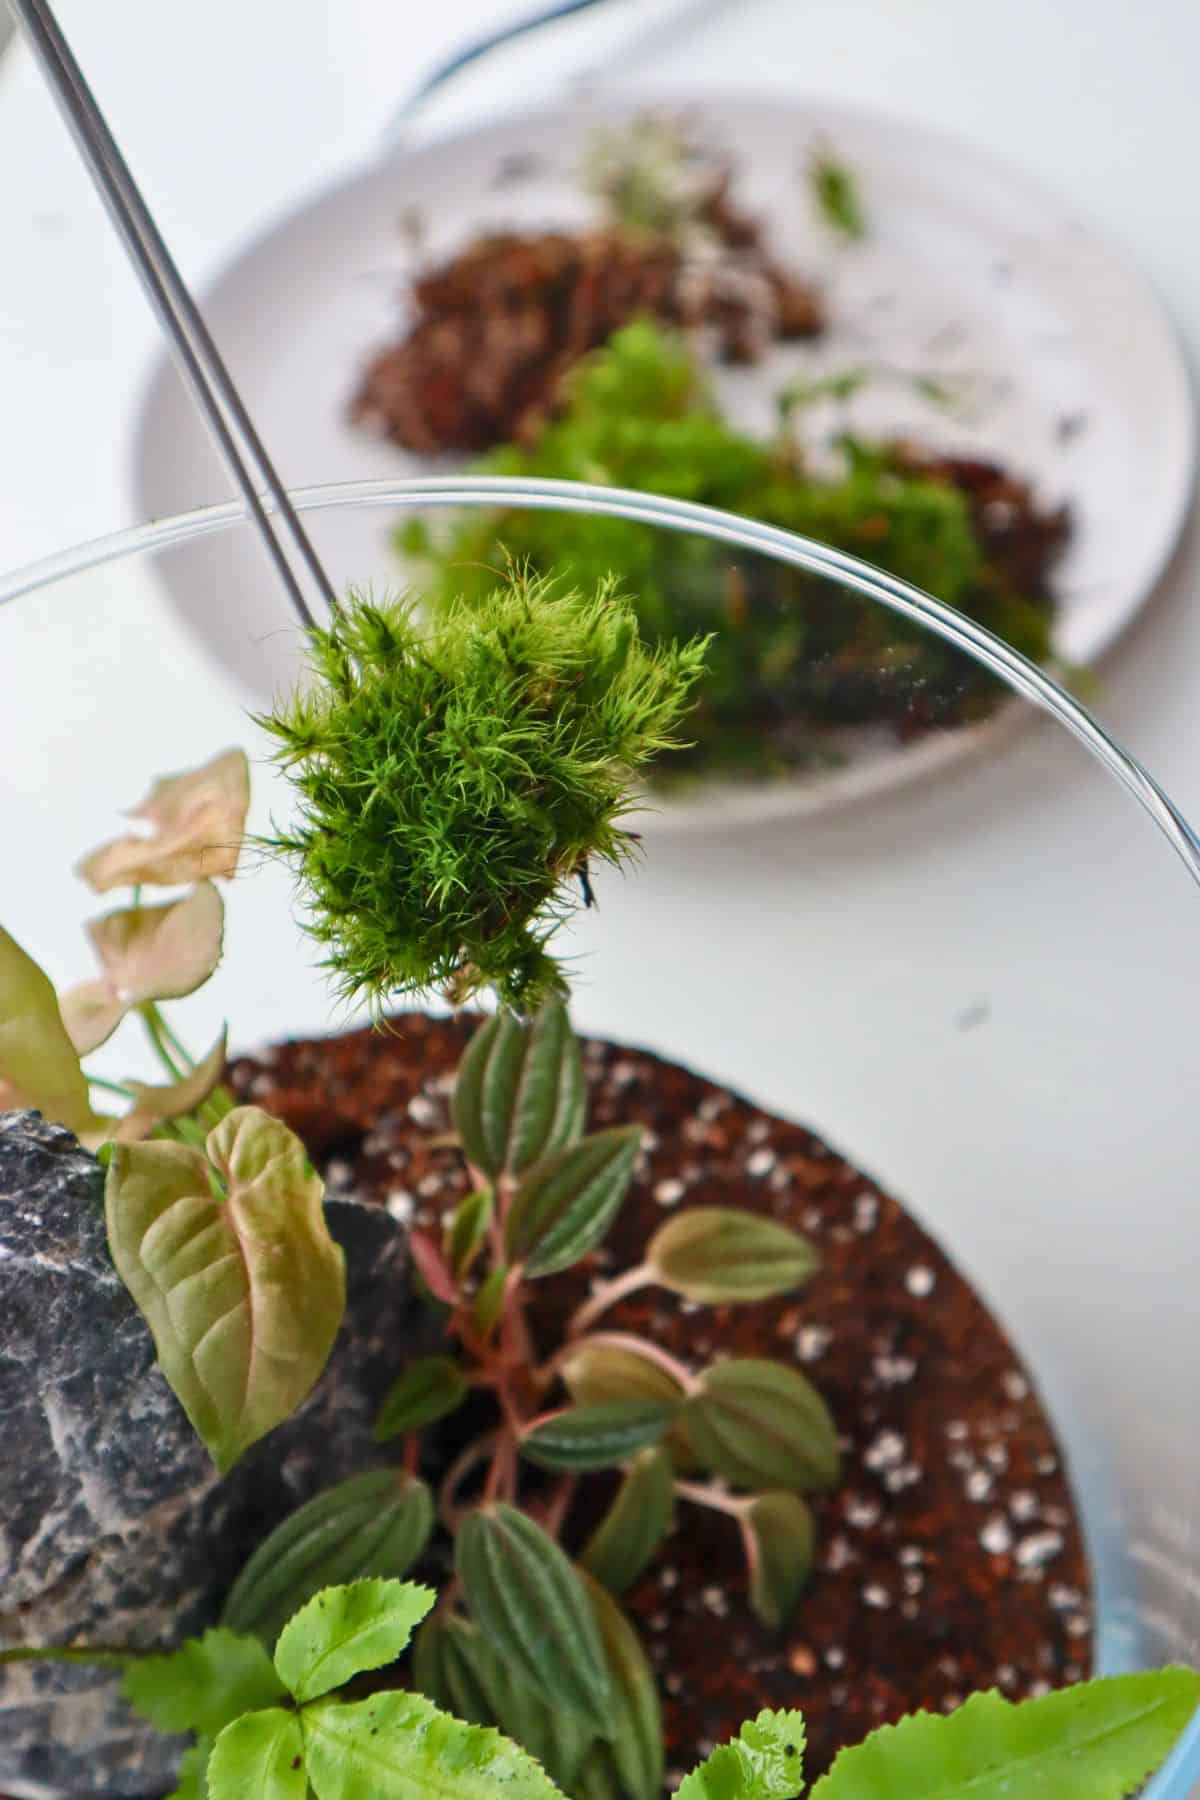
Cushion Moss, Mood Moss, Hypnum Moss, and Fern Moss can all work well in humid terrarium conditions. Clumpy mosses are great for adding texture around rocks and wood, while sheet mosses are better for covering larger areas of substrate.
Before placing moss, trim away any thick, fibrous underside if needed. Then press the moss gently onto the substrate with the green side facing outward.
You don’t have to cover every inch of soil, but it does create a lovely effect.
8. Water Lightly and Seal It Up
Once everything is planted, give the terrarium a light watering with a spray bottle.
The goal is to moisten the substrate, not drown it.
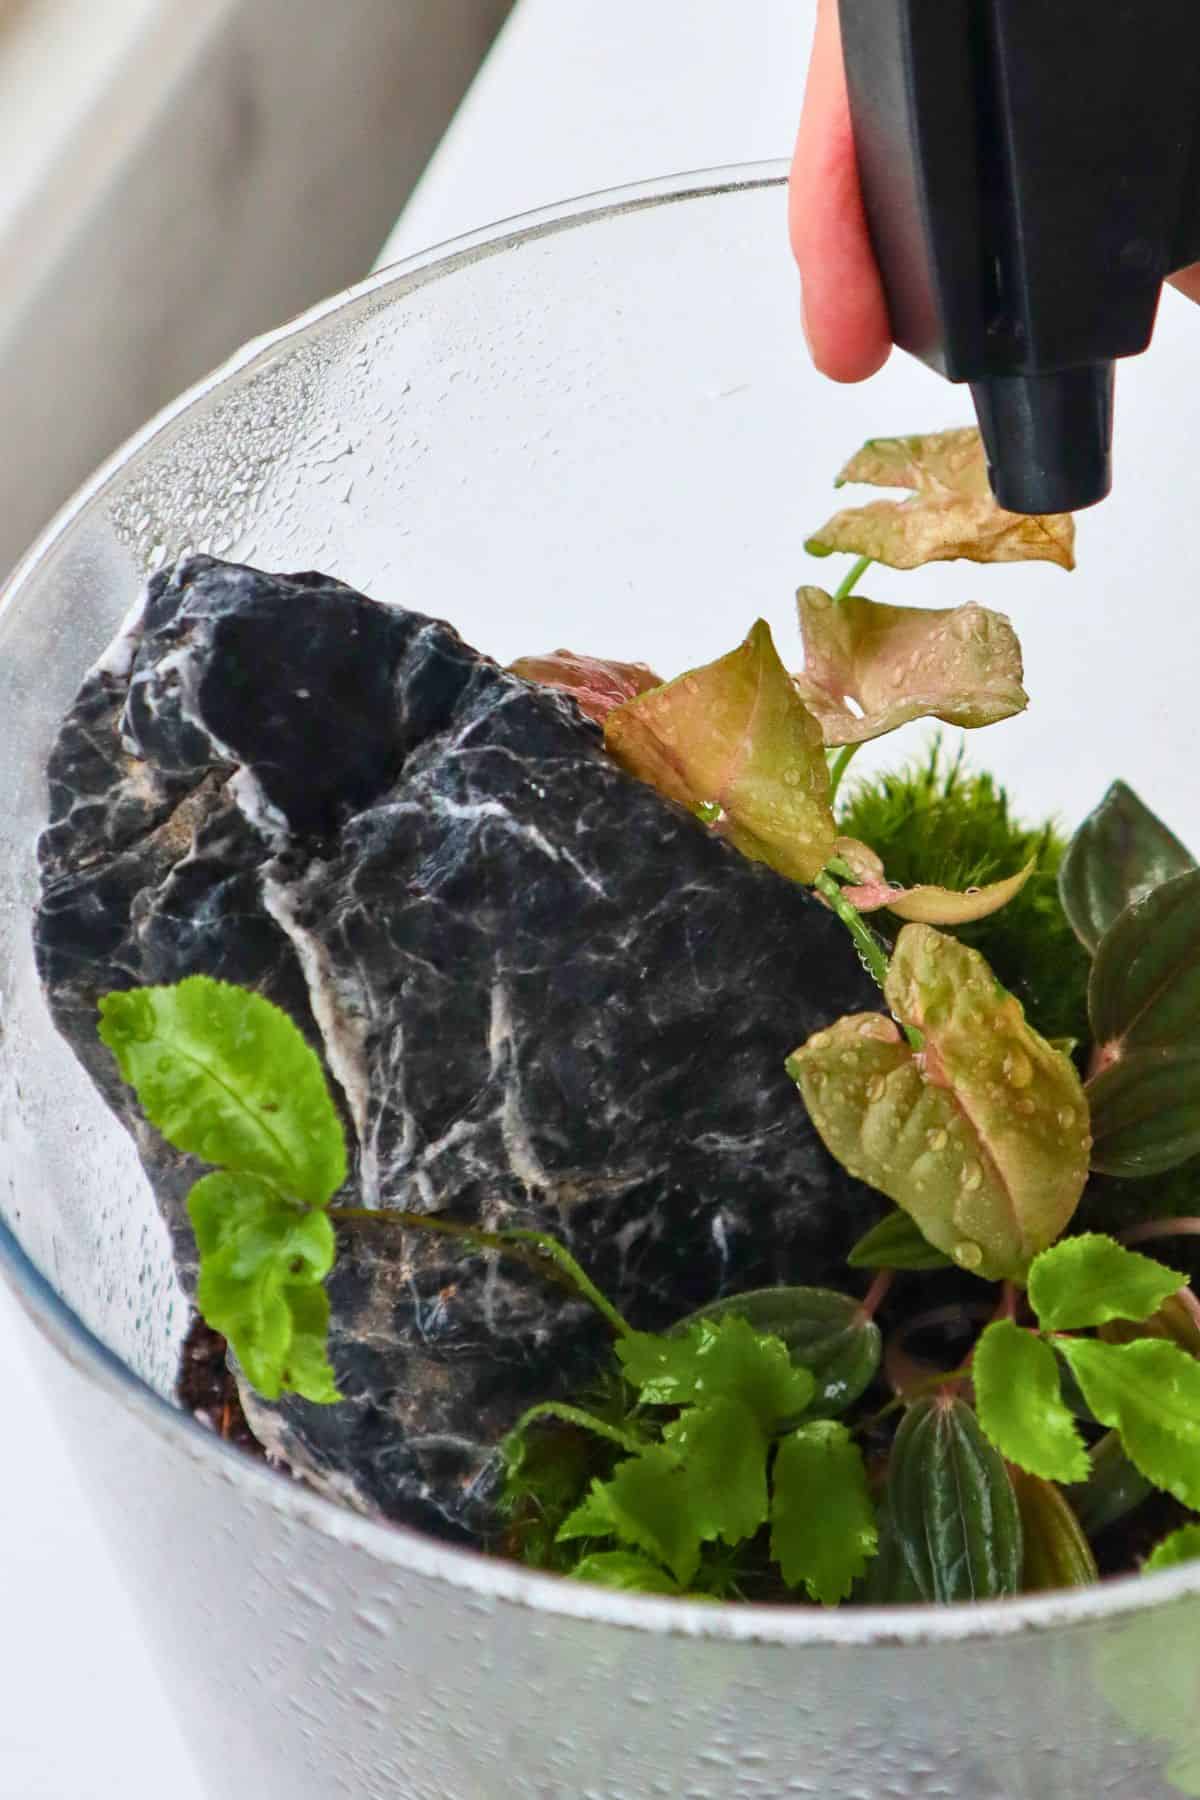
This is where a lot of people go wrong. A closed terrarium recycles moisture, so it needs far less water than a regular houseplant pot. If water starts pooling heavily in the drainage layer straight away, you’ve probably added too much.
After watering, seal the container with its lid or temporary cover.
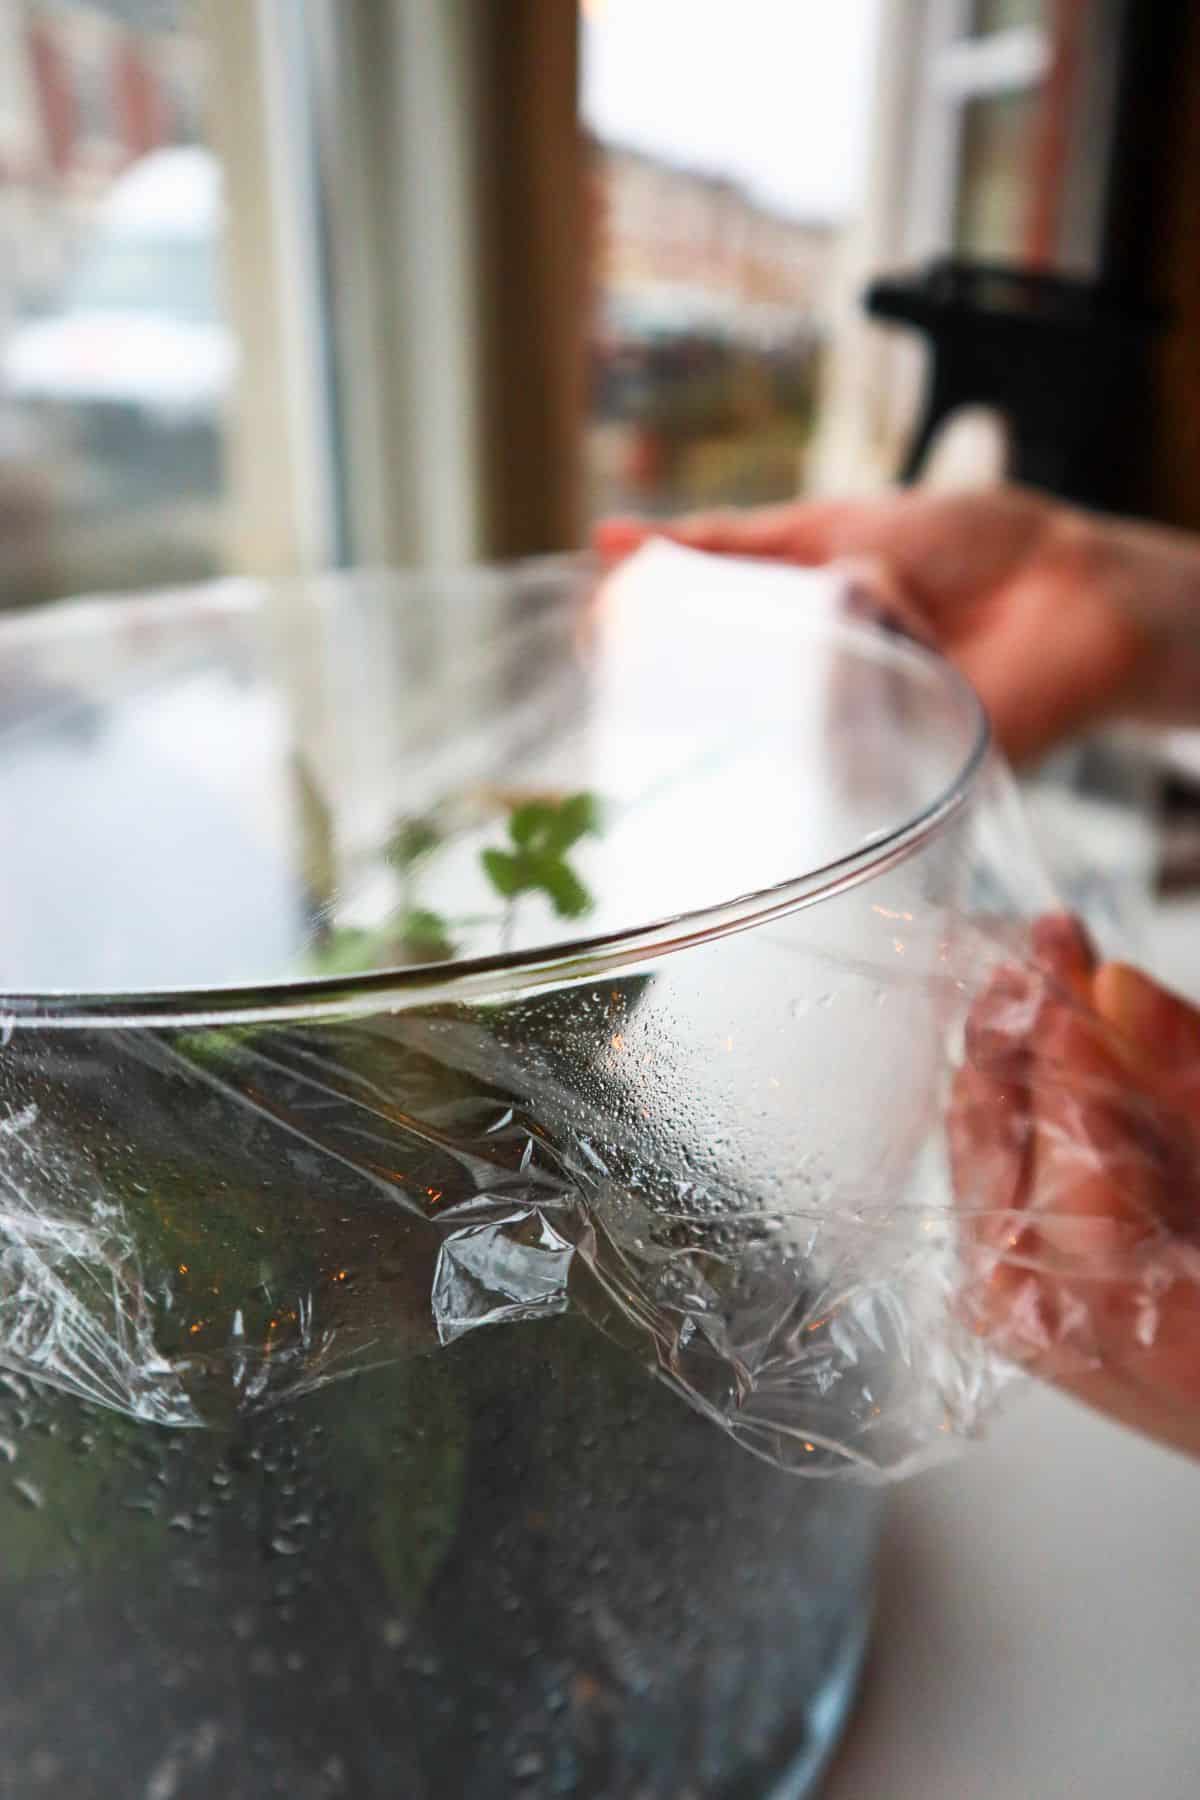
Then watch the condensation over the next few days.
A little condensation is normal. In a closed terrarium, you should expect some moisture on the glass, especially in the morning or after the lights have warmed the container.
But if the glass is constantly dripping wet and you can barely see inside, it’s too wet. Open the container for a while to let some moisture escape, then close it again.
Aftercare: Getting Your Terrarium Settled
A well-built terrarium ecosystem mostly looks after itself, but it can take a little time to adjust.
In terms of care, here are the main points to look out for.
- Light – Keep your terrarium in a spot where it receives plenty of bright indirect sunlight. An hour of direct sunlight here and there is generally fine, but too much will scorch your plants.
- Water – Knowing how to water a terrarium properly is half the battle. If the substrate looks bone dry and/or your plants are wilting, add a couple of extra sprays where needed.
- Mold – One (super common) problem with new terrariums is a mold outbreak. The heat and humidity make terrariums an ideal environment for mold. Don’t panic if this happens! It’s totally normal and will often resolve itself in a few weeks.

A great way to avoid mold issues from day one is to add a live springtail culture. These tiny detritivorous insects that feed off mold – handy, right?
A DIY Build That Just Works
And that’s the build!
All it takes is a solid container, proper layering, suitable plants, and enough restraint not to drown the thing on day one.
Honestly, terrariums aren’t fragile little ornaments. Built with the right structure, they’re surprisingly resilient.
Most problems come from poor plant/substrate choice (and overzealous watering).
So, stick to the fundamentals, and you’ll avoid 90% of the common mistakes.
Build the layers properly, choose plants that suit the environment, and give the terrarium time to settle. Do that, and you’ll have something that looks good now and has a much better chance of still looking good months from now.
This is very helpful, I recently started building terrariums as a hobby and I love it. I have one terrarium with a heart fern that had a couple of moldy leaves that I trimmed back. It’s a small terrarium, so I’m not sure springtails are the best option. Can you offer any suggestions? How does one control the springtail population? Thanks!
Hi Sarah, even small terrariums are suitable for Springtails (and the population will generally take care of itself). They’re definitely the best way of managing mold – but there are other things that can help too.
What kind of terrarium would you recommend for someone that travels a lot? Basically I want to be off for a month (without having to ask a friend to come and look after my terrarium), come back, and still have the plants alive 😅
A closed terrarium that’s already been established for a few months is your best bet – we’ve had terrariums we can leave much longer than a month, but in the beginning they usually need a bit of tweaking to get the cycle balanced. That said, when we were going away for a few months we gave ours to our family to care for, they didn’t listen to instructions, and the terrariums are no more 😂
I thank you for this information because I love fairy gardens. So I’m going to make my first terrarium and incorporate a fairy garden scene with it.
How much does a terrarium like this cost. i already have the container and drainage material (gravel). i am planning on doing a tropical sealed terrarium.
Hi Conrad – check out our “how much does a terrarium cost” post 🙂
I recently went to a place where I built my own terrarium using plants the place gave me. Some had roots and others did not. Which types of plants need roots and which can be planted just by the stem?
Hi Nancy – it completely depends on the plant, but many tropical plant cuttings will root up readily in a container. Check out Pilea glauca, Calissia repens and Ficus pumila.
Hello. What would you recommend as the key tools to get when starting out making closed terrariums?
Hey – check out our terrarium tools article for that info :).
Hi Dan!
Thank you for your advice on terrariums! I love them and eventually want to create bigger ones. Right now though, I’ve got a tiny apothecary jar terrariums. It wasn’t doing too well so I moved it to a new location and it is really thriving there. This is great, but the plants have been growing out of control – so much so they have started to lift the top of the jar and I cannot see the other plants (mosses). I’m not sure what to do about that. Is it safe to prune?
Thanks!
Brooke
No worries Brooke, sounds like you’re doing something right! Absolutely, it’s safe (and recommended to prune) where necessary, otherwise some plants might end up hogging all the light and resources.
Thanks so much for this. My son gave me a Bioactive one for Christmas and he’s so proud of his efforts. It is lovely but I know nothing about them! A Google search left me feeling completely overwhelmed and expecting a slow decline for his pressie. But this definitely gives me hope. And a new found interest 😁
Great
I’m just getting started and bought all the supplies from your shop, including a batch of springtails. My question: is there anything wrong with eventually adding some pillbugs from my own yard, fancy though they be not?
We don’t typically recommend it simply because it’s hard to know what you’re getting. They may be a species that’s unsuitable for terrarium life, loves to eat plants, or carries infections. That’s why we recommend and sell captive-bred, tried and tested cleanup crew species (and thanks so much for getting your supplies from us!).
Amazing articles, Dan and Rea!
I built my own Terrarium and it looks gorgeous. I used the tips on your website and the outcome is better than what I imagined. Thank you so much!